Auditing changes to permissions on a file server is important for several reasons. First and foremost, it helps to ensure the security of sensitive data by detecting any unauthorized changes made to file permissions. By regularly auditing changes to permissions, system administrators can identify any suspicious activity and take corrective action to prevent data breaches or other security incidents.
Additionally, auditing changes to file server permissions can help to maintain compliance with regulatory requirements, such as those governing data privacy and protection. By demonstrating that changes to permissions are being audited and appropriate access controls are in place, organizations can avoid costly fines and legal penalties.
Furthermore, auditing changes to permissions can help to improve accountability and transparency within an organization. By keeping a record of all changes made to file permissions, system administrators can track who made the changes and when which can be useful for troubleshooting or investigating security incidents.
Overall, auditing changes to permissions on file servers is a critical component of any organization’s data security strategy, helping to protect sensitive data, maintain compliance, and improve accountability and transparency.
In this article, we will show you how to audit File server permissions using event logs and by using Lepide File Server Auditor.
Steps to Audit Permission Changes on File Servers using Event Logs
Follow below given steps to enable auditing and track related events in Event Viewer:
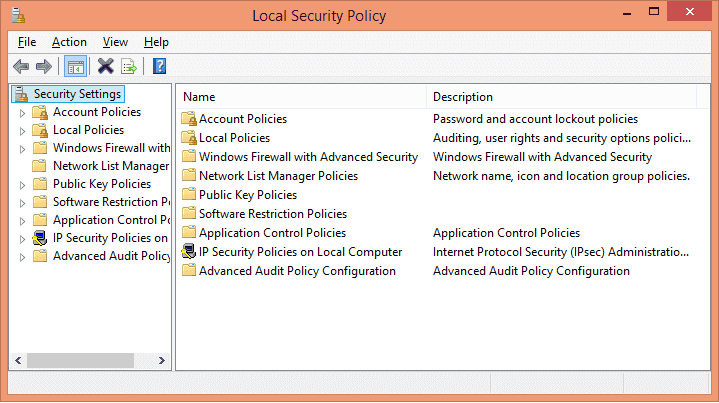
Step 1: Open Local Security Policy
Go to “Administrative Tools” and open “Local security policy”.
Step 2: Enable Audit Object Access policy.
In “Local Security Policy”, click “Local Policies”, and click “Audit Policy”. List of all Local Security Policies is displayed in the right pane.
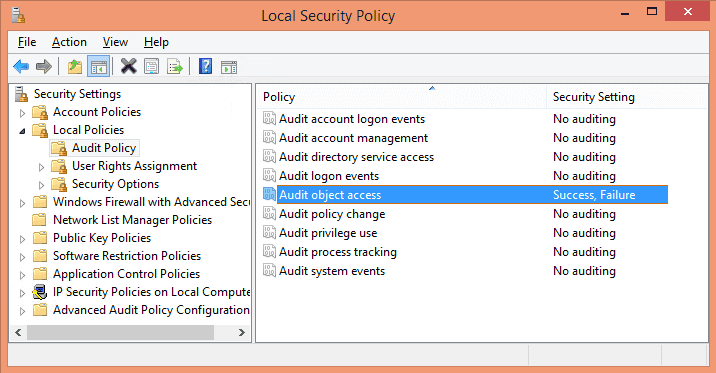
In the policy list, double click “Audit object access” to open “Properties” window.
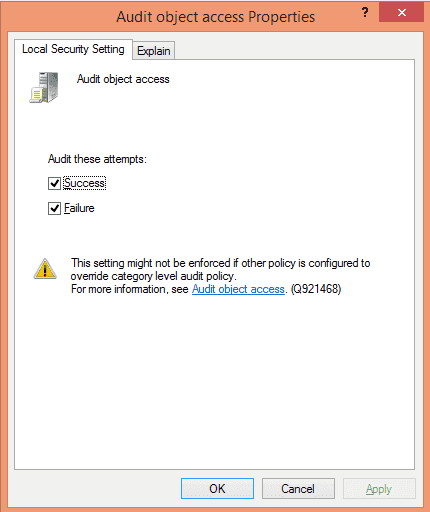
Select “Success” and “Failure” checkboxes. Click “Apply” and “OK”.
Step 3: Track permission changes
Next, locate the folders whose permission changes have to be tracked. Right-click on it and select “Properties” from the context menu. In “Properties” window, switch to “Security Tab”.

Click “Advanced” to access the advanced settings
Step 4: Add a new auditing entry
In “Advanced Security Settings”, go to “Auditing” tab.
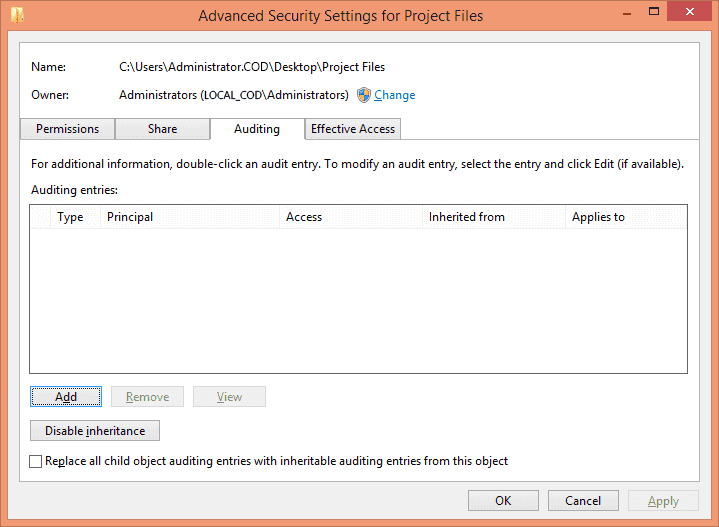
Click “Add” to add a new auditing entry. “Auditing entry… ” window appears on the screen.
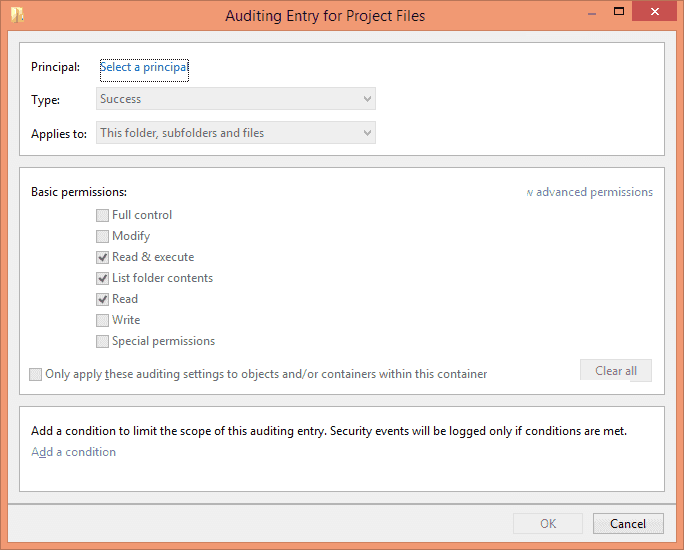
Enter the following information in this dialog box:
Principal: Click on “Select a Principal” link to select users for auditing. You can also select “Everyone”, for that type “Everyone” in the text box and click “Check
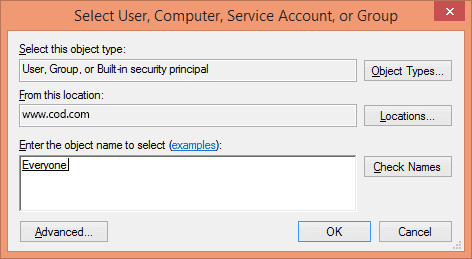
Click “OK”. It takes you back to “Auditing Entry” window.
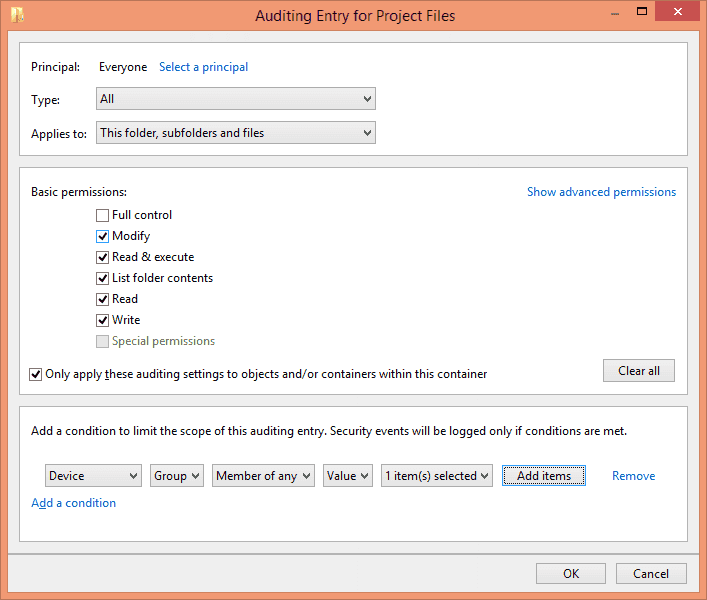
Type: In “Type” drop-down menu, select “Success”, “Fail” or “All” as per requirement. It is recommended to audit “All” changes.
Applies To: Select “This folder, subfolders and files” to apply this auditing to all files and folders in the selected folder.
Basic Permissions: Select the permissions that you want to audit.
Add a condition: Click “Add a condition” to narrow the scope of auditing, this ensures that you have limited events logs to search. You can add multiple conditions if you want.
Click “OK” to close the window.
Click “Apply” and “OK” to close the “Advanced Security Settings…” window. Click “OK” to close the folder’s “Properties”.
Step 5: View changes in Event Viewer
After you have enabled the auditing, the events will be logged in the system whenever a change in permissions of that folder is detected. To view the logs, go to Control panel → Administrative Tools → Event viewer. Now open the event logs and go to “Windows Logs”, and select “Security”. All the events in this category are displayed in the middle pane.
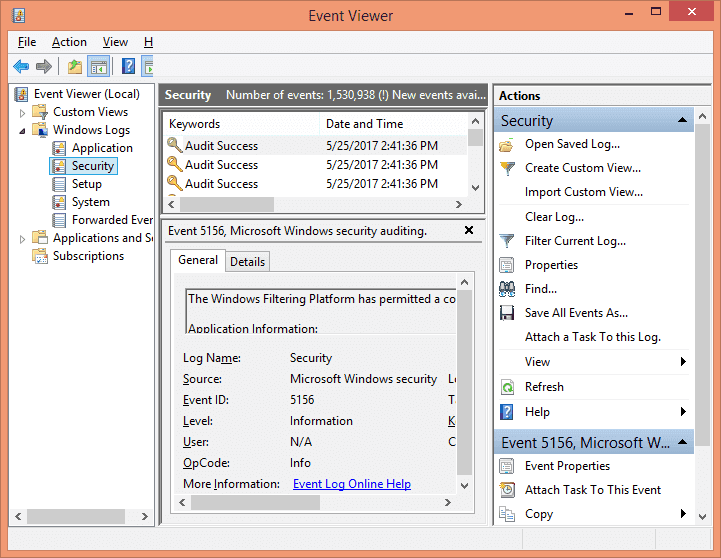
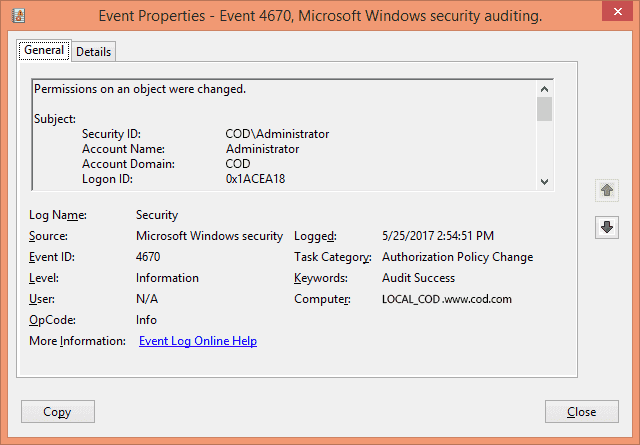
Step 6: Search for the Event ID 4670
On the right side, select the “Filter current log…” option. From this option, you can easily add filters to find specific event logs from all the logs on the file server. Search for the Event ID 4670 that corresponds to permission changes on an object.
After you have found the events, double-click any event to view its properties in the “Event Properties” window. Here, you find all the details related to the event.
How Lepide File Server Auditor Tracks Permission Changes
Lepide File Server Auditor gives you an easy way to detect, monitor, and report on file server permission changes.
Just select the report from the list of pre-defined reports, specify a date range whose report you want, and click the “Generate” button.
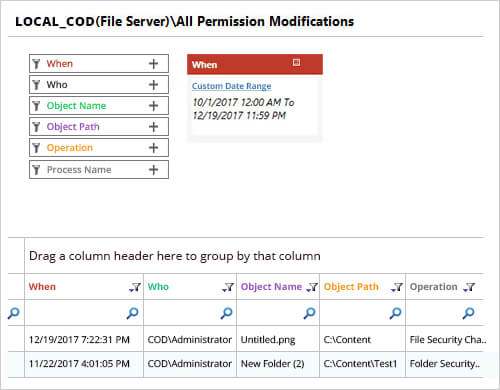
This report gives the following information.
- What – Permission that was changed.
- When – When it was changed.
- Who – Who changed the permission.
- Object Name – File or folder, whose permission was changed.
- Object Path – The location of the object.
- Operation – What was exact operation, what was changed
- Process Name – process name
- From – From which computer the permission was changed.
With Permission Changes Report, Lepide’s File Server audit solution comes inbuilt with Historical Permission Analysis (that shows changes in permissions of shared files and folders) and Current Permission Report (that shows current effective permissions of shared files and folders).
Conclusion:
This article shows the way to audit permission changes in File Server using the native method. In the end, the article also shows the process to achieve the next-gen level of auditing through an even easier method which is through Lepide File Server Auditor. Such reports will not only help you in meeting compliance requirements but will also help you in keeping your enterprise boundary secure.
