What happens if user or group permissions assigned for accessing network resources are changed? What kind of damage is your network likely to experience in such cases? How will you determine who changed these permissions and when?
In organizations with complex IT infrastructures, it is crucial to define access control rights with the utmost care. The level of access given to every employee should be monitored to prevent tampering of confidential data. Administrators may face numerous challenging tasks every day, and tracking changes made to objects is one of them – although it doesn’t have to be.
The smallest permission change made in the Active Directory could result in unwanted modifications made to files/ folders, destruction of confidential data, unauthorized access or inappropriate disclosure of sensitive data to undesirable parties. The access permissions given to privileged users or groups play a significant role in modifications made to several components in Active Directory.
In this article, I will show you the steps you need to take to detect permission changes using native auditing and introduce a simpler method.
Detecting Permission changes in Active Directory using Native Auditing
Step 1: Modify an existing or a new Group Policy Object
Perform the following steps to apply policy:
- Go to “Control Panel” ➔ “Administrative Tools”, double-click “Group Policy Management Console” to access its window.
- Navigate to “Forest” ➔ “Domains” ➔ “www.domain.com” in the left panel.
- Right-click “Default domain policy” or any customized domain wide policy.
NOTE: Our experts recommended to create a new customized GPO, link it to the domain and edit it from there. Click “Edit” option in this menu to open the window of “Group Policy Management Editor”.
- Go to “Computer Configuration” ➔ “Policies” ➔ “Windows Settings” ➔ “Security Settings” ➔ “Advanced Audit Policy Configuration” ➔ “Audit Policies”.
- Click “Audit Policies” and all of the policies are displayed in right panel.
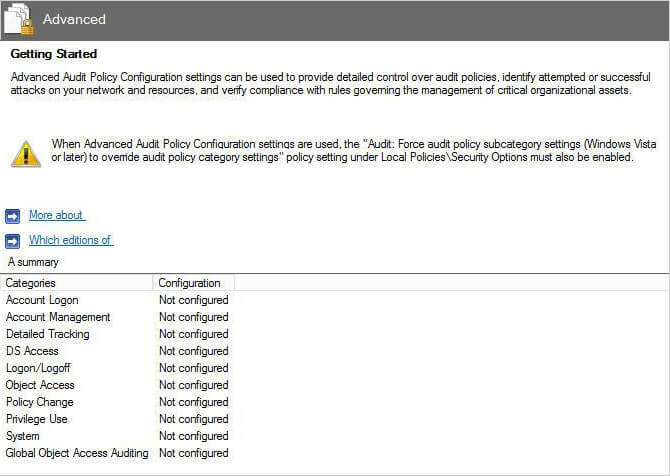
Figure 1: “Group Policy Management Editor” - Double-click “DS Access” to define the required settings.
- Right-click “Audit Directory Service Changes” policy and click “Properties” option to access policy properties.
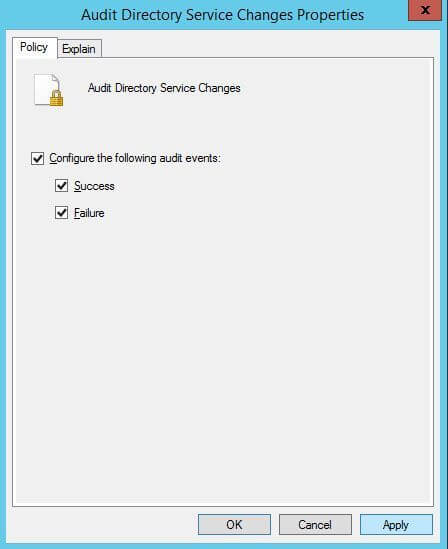
Figure 2: Enable policy for both “Success” and “Failure” - Click “Define these policy settings” option to select it.
- Click checkboxes of both “Success” and “Failure”.
- Click “Apply” and “OK”.
- Close “Group Policy Management Editor” window.
Step 2: Enable auditing using ADSI
Perform the following steps to apply policy:
- In the “Run” box or “Command Prompt”, type “ADSIEdit.msc” and press “Enter” key to open its console
- Right-click “ADSI Edit”, a top most node in the left panel.
- Select “Connect to” in the context menu to access “Connection Settings” window.
- To establish a connection with a naming context, click “Select a well known naming context”.
- Click “Default naming context” in the drop-down menu.
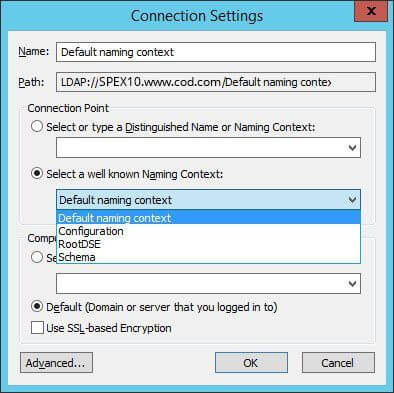
Figure 3: “Connection Settings” window - Right-click “DC=www,DC=domain,DC=com” under “Default naming context” in the left panel.
- Click “Properties” in the context menu to access the properties of above node.
- In its window, switch to “Security” tab.
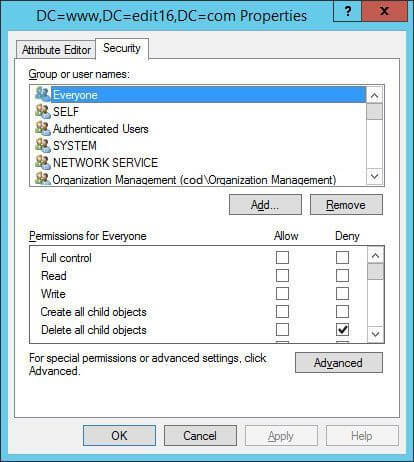
Figure 4: “Security” tab in Properties - Click “Advanced” to open “Advanced Security Settings” window.
- Switch to “Auditing” tab.
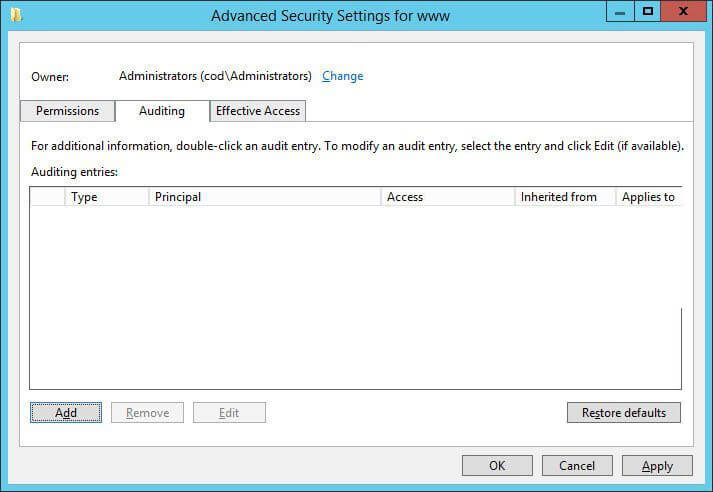
Figure 5: “Advanced Security Settings” window - To add an auditing entry, click “Add”.

Figure 6: “Auditing Entry” window - In “Auditing Entry” window, click “Select a principal” and add “Everyone” (any specific user, computer, group or service account can be added).
- Select “All” in “Types” drop-down menu.
- In “Applies to” drop-down menu, select “This object and all descendent objects”.
- In “Permissions” section, select only “Modify permissions” option. Uncheck all other permissions.
- Click “OK”.
- You can see auditing entry with this permission in “Auditing” tab of “Advanced Security Settings” window.
- Click “Apply” and “OK” to close “Advanced Security Settings” window. It takes you back to “Security” tab for object properties.
- Here also, click “Apply” and “OK” to close the properties window.
- Close “ADSIEdit” window.
Step 3: View the event in Event Viewer
Perform below-mentioned steps:
- In “Event Viewer” window, go to “Windows Logs” ➔ “Security” logs.
- Click on “Filter current log” under “Action” in the right panel.
- Search for Event ID 5136 that identifies permission changes in Active Directory.
You can double-click on the searched event to view “Event Properties”.

Figure 7: Event Properties – Permission changes in Active Directory
You can also execute the below command in “Active Directory Module for Windows PowerShell”. It gives a list of security events with all details:
Get-EventLog Security –Newest 10 | Where-Object {$_.EventID –eq 5136} | Format-List
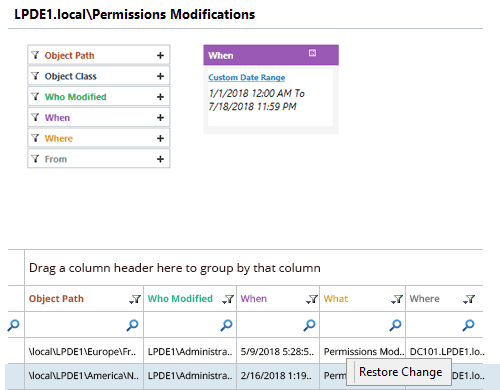
Audit Permission Changes with Lepide Active Directory Auditor
With Lepide Active Directory Auditor (part of Lepide Data Security Platform) installed in your network, you are just one click away from instant insight into changes being made that may affect the security of your infrastructure. Securing your Windows network using the native approach seems tedious and overly complex when compared to our scalable, user-friendly solution – and I will show you why. The following report shows all permission changes in Active Directory objects. You can also easily reverse the unwanted permission changes to an ideal state.
