Over time, permission changes, broken inheritance, shared links, and external collaboration can result in users gaining access to SharePoint folders they no longer need. Identifying these overshared SharePoint folders requires visibility over who has access, how that access was granted, and whether it is still required. Therefore, it is essential to regularly review folder permissions to help reduce the risk of unauthorized access, strengthen data security, and ensure that sensitive information is only accessible to the right people.
In this article we will look at how to identify overshared SharePoint folders using native methods and then an alternative method of using the Lepide Data Security Platform. These methods can help identify overshared folders in both SharePoint Server and SharePoint Online environments.
For SharePoint Server
Method 1: Review Folder Permissions
Reviewing folder permissions is the quickest way to determine who has access to a specific folder and whether that access has been granted more widely than intended.
The steps to do this are as follows:
- Open the SharePoint site that contains the document library.
- Navigate to the document library and locate the folder you want to review.
- Select the folder and open its Permissions page.
- Depending on the SharePoint Server version and interface, select Shared With, Advanced or Manage access, Advanced.
- Review all users and groups that have access to the folder.
- Identify direct permissions and expand the relevant SharePoint, Microsoft 365, and Microsoft Entra security groups to determine their effective membership.
- Look for broad access granted to groups such as Everyone or large departmental groups.
- Determine whether all listed users and groups still require access.
Method 2: Check for Unique Permissions
Folders with unique permissions are a common source of oversharing because they no longer inherit access from the parent library.
The steps to do this are as follows:
- Select the folder you want to review and open its Permissions page using Shared With, Advanced or Manage access, Advanced, depending on the SharePoint Server version and interface.
- Check whether the folder inherits permissions from its parent or has unique permissions.
- If the folder has unique permissions, review every user and group with access.
- Compare the folder’s permissions with those of the parent library.
- Verify that each unique permission assignment is still required.
- Remove unnecessary unique permissions or restore inheritance if appropriate.
Method 3: Review SharePoint Groups and Active Directory Groups
Many folders are shared through SharePoint groups or Active Directory security groups rather than individual user accounts.
The steps to review these are as follows:
- Review each SharePoint group that is assigned to the folder.
- Open the group to view its members.
- If Active Directory security groups are assigned, open Active Directory Users and Computers.
- Locate each security group.
- Review group membership, including any nested groups and identify:
- Former employees
- Contractors
- Temporary users
- Large groups that provide unnecessary access
- Remove the folder’s assignment to the group if the group should not have access.
- Remove users from the group only if they no longer require access to every resource granted through that group.
For SharePoint Online
Method 1: Review Folder Permissions
This method shows who currently has access to a folder and whether permissions have been assigned directly or inherited.
The steps to do this are as follows:
- Open the SharePoint site.
- Navigate to the document library.
- Select the folder you want to review.
- Click the More options (…) menu.
- Select Manage access.
- Review all users and groups listed. Identify:
- Users with direct access
- Microsoft 365 groups
- SharePoint groups
- Users who no longer require access
- Verify whether access is appropriate for the folder’s contents.
Method 2: Review Sharing Links
Sharing links often grant access beyond the intended audience and are a frequent cause of oversharing.
The steps to do this are as follows:
- Open the document library.
- Select the folder.
- Click Manage access.
- Review all active sharing links associated with the folder.
- Check whether links are configured as:
- Anyone
- People in your organization
- Specific people
- Remove links that are no longer required.
- Confirm that the remaining links follow your organization’s sharing policy.
Method 3: Review External Sharing
External users may retain access to folders long after collaboration has ended.
The steps to do this are as follows:
- Open the folder in SharePoint Online.
- Select Manage access.
- Review guest users and all sharing links associated with the folder, including Anyone and Specific people links.
- Identify external access that is no longer required.
- Remove unnecessary guest access where appropriate.
- Confirm that external sharing aligns with your organization’s security policies.
Method 4: Use Microsoft Purview Audit
Audit logs can help identify recent sharing activity that may have resulted in oversharing.
The steps to do this are as follows:
- Sign in to the Microsoft Purview portal.
- Navigate to Solutions, Audit.
- Create a new audit search.
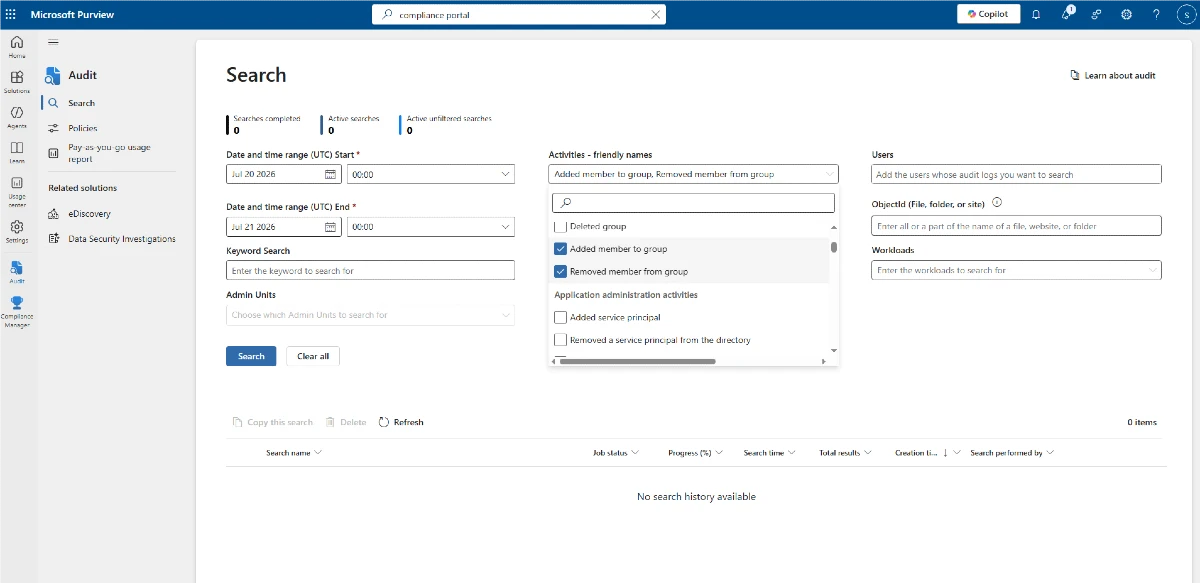
- Select the applicable SharePoint sharing and access activities available in the Activities – friendly names filter, such as activities for sharing a file, folder, or site; creating sharing links; and changing permissions
- Specify the date range and users if required.
- Run the search.
Review the results to identify unexpected sharing events or permission changes that require investigation, and then verify the folder’s current permissions in SharePoint.
Method 5: Review Site Sharing Settings
A site’s sharing configuration determines how folders within the site can be shared. Reviewing these settings helps identify sites where oversharing is more likely.
The steps to do this are as follows:
- Sign in to the SharePoint admin center.
- Go to Sites, Active sites, select the site, open the Settings tab, and select More sharing settings.
- Check whether the site allows:
- Anyone links
- New and existing guests
- Existing guests only
- Only people in your organization
- If the site permits broad sharing, review folders within the site to ensure they have not been shared more widely than intended.
How Lepide Helps
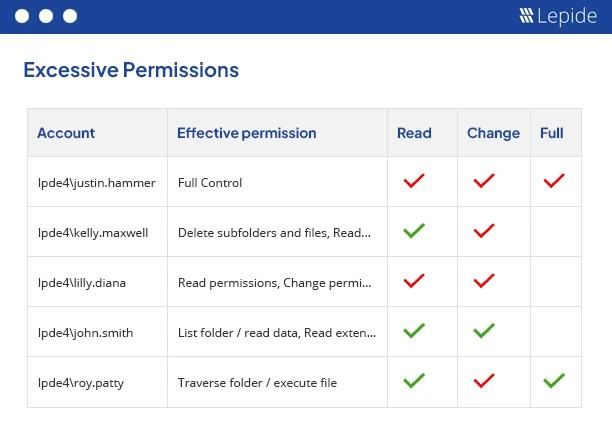
The Lepide Data Security Platform simplifies the process of finding SharePoint folders that may be accessible to more users than necessary. Lepide Trust enables administrators to examine access at the folder level, including the users and groups with permissions, their permission levels, and how access is assigned. This information helps pinpoint folders with broad or unused access and supports decisions about which permissions should be removed.
The screenshot below shows the Excessive Permissions by Object Report available in Lepide Trust. Generate the report and examine each folder’s permission assignments to find users or groups whose access may no longer be justified. Administrators can then verify the findings with the relevant data owners before revoking unnecessary permissions.