File and folder auditing is the process of tracking and logging user access, modifications, and deletions to files and folders on a Windows Server. Enabling file and folder auditing on a Windows file server is important for several reasons. Auditing allows you to track and monitor access to files and folders on the server. By enabling auditing, you can identify suspicious or unauthorized activities, such as unauthorized access attempts, modifications, or deletions of files. This information is crucial for detecting security breaches, investigating incidents, and preventing future unauthorized access.
Many industries and organizations have regulatory requirements that mandate auditing and monitoring of file access. Enabling auditing helps you demonstrate compliance with these regulations and provides an audit trail for potential audits or investigations.
Auditing also promotes accountability by attributing actions to specific users. When auditing is enabled, you can identify who accessed or modified a file, which is useful for tracking down responsible individuals in case of policy violations, data breaches, or accidental data loss.
Additionally, in the event of a security incident or suspicious activity, auditing provides detailed information about file access and changes. This information is valuable for conducting forensic investigations to understand the extent of the incident, identify the source, and take appropriate remedial actions.
Auditing can also provide valuable operational insights into file usage patterns, access frequency, and user behavior. This information can be utilized to optimize file and folder structures, enhance data management processes, and identify areas where access controls may need adjustment.
In this article, we will go through the process of enabling file and folder auditing on Windows file server. There are two main native methods to do this:
- Enable ‘Audit Object Access’ audit policy
- Enable Auditing of Specific File and Folder
We will also show you how to configure audit settings for files and folders, and show you a how Lepide Auditor for File Server enables you to completely simplify auditing file and folder changes.
Prerequisites
Before you begin, ensure you have the following:
- Administrative privileges on the target server
- Access to Group Policy Management Console (for domain environments)
- Domain controller access (if applying GPO across the domain)
- Sufficient disk space for audit log storage
1. Enable ‘Audit Object Access’ audit policy
To enable auditing through GPO, follow these steps:
- Go to “Start” ➔ “Control Panel”. In this window, double-click “Administrative Tools”, and then double-click “Group Policy Management” console to open it.
- Go to the concerned domain and expand it as shown in the following figure.
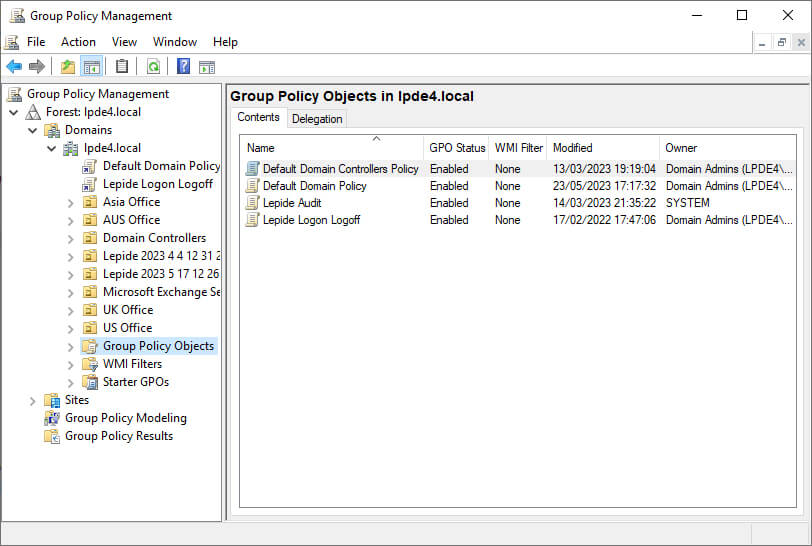
Figure 1: Go to concerned domain and expand the node - Right-click “Group Policy Objects, and click “New”.
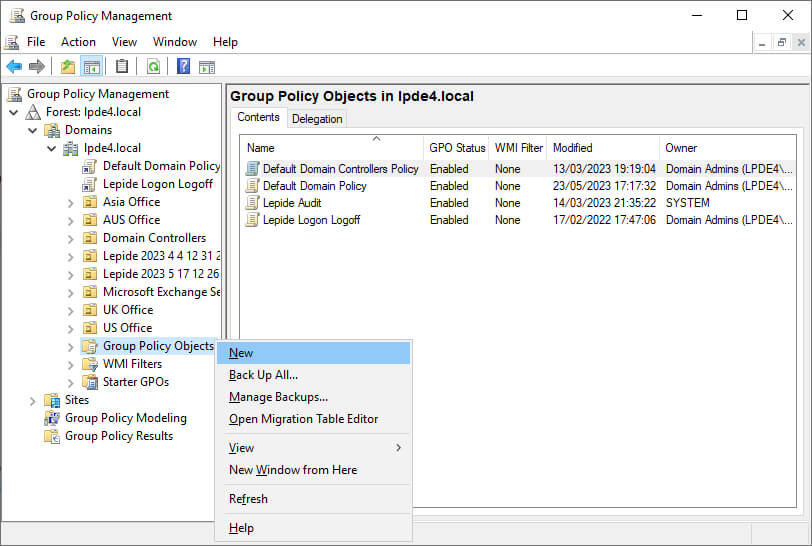
Figure 2: Select New from the context menu - In “New GPO” dialog box, enter the name of new GPO and click “OK”.
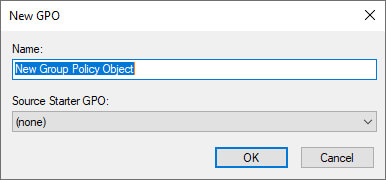
Figure 3: Enter new GPO’s name - Right-click the newly created GPO and click “Edit” to open “Group Policy Management Editor” window.
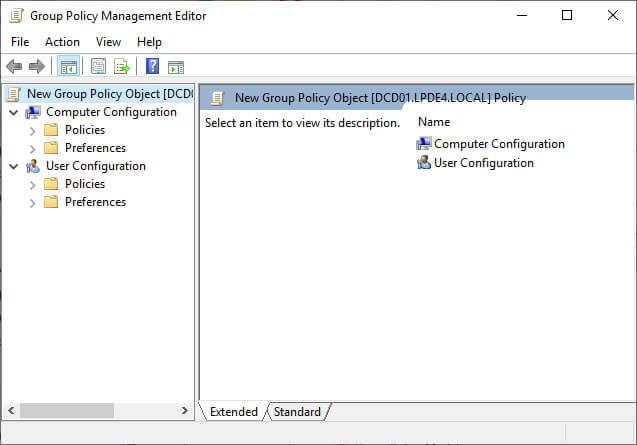
Figure 4: GPO management editor - In “Group Policy Management Editor”, go to “Computer Configuration” ➔ “Policies” ➔ “Windows Settings” ➔ “Local Policies”.
- Select “Audit Policies” to view all of its policies in the right panel.
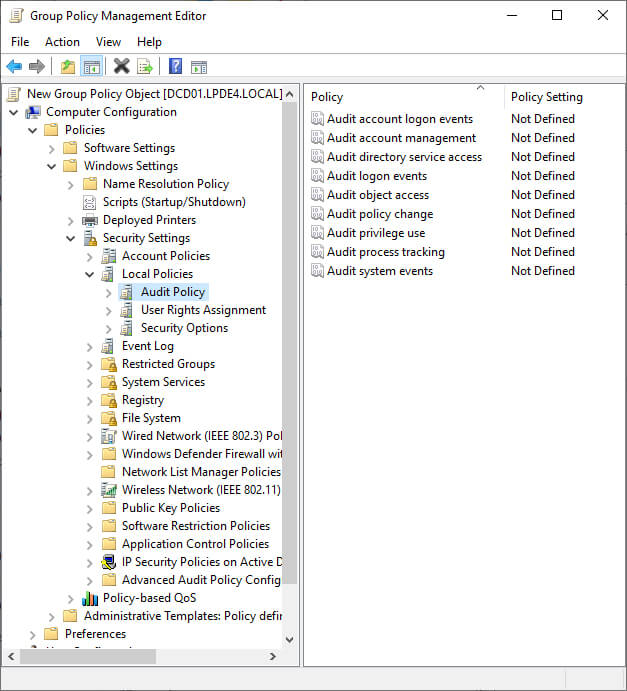
Figure 5: Audit policies - Double-click “Audit Object Access” to access its properties
- Click “Define these Policy Settings” to check its box.
- Check both “Success” and “Failure” boxes.
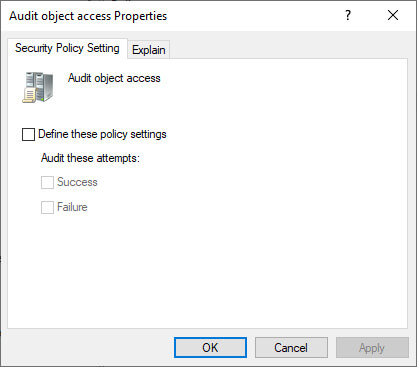
Figure 6: Configure Audit object access - Click “Apply” and “OK”.
- Execute the following command at “Run” or “Command Prompt” to apply this policy on the domain controller.
gpupdate /force
After the policy has been applied, you can configure audit settings for File and Folders.
2. Enable Auditing of Specific File and Folder
To select specific folders and define users, follow these steps.
- Select the folder that you want to audit.
- Right-click and click “Properties” to access its properties.
- Go to “Security” tab, and click “Advanced”.
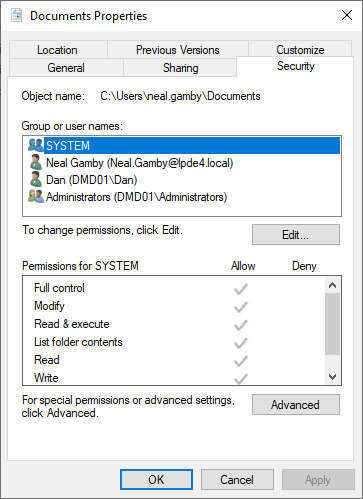
Figure 7: Property sheet of the folder - In “Advanced Security Settings…” dialog box, select “Auditing” tab.
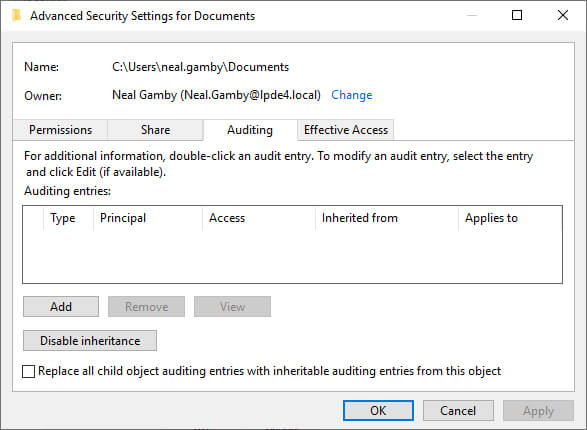
Figure 8: Click the Auditing tab - Click “Add”. “Auditing Entry for…” window appears on the screen.
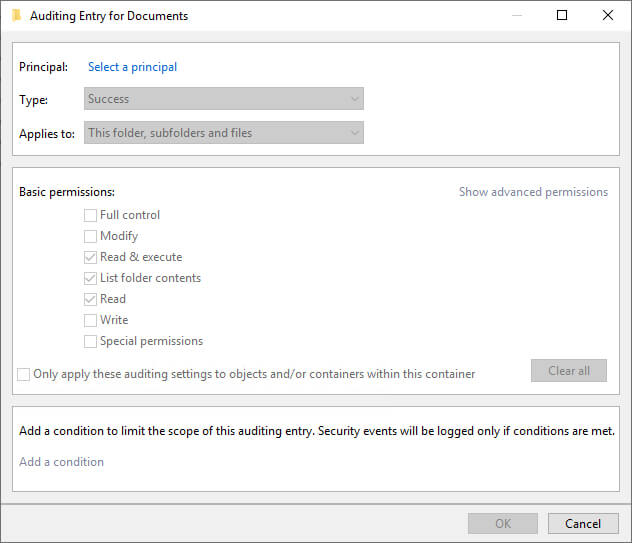
Figure 9: Auditing Entry for Documents dialog box - Click “Select a principal” link. It shows “Select User…” dialog box.
- Type the name of that user, of which access you want to monitor. Click “Check Names” button to validate its entry. You can repeat this step to provide the names of all users, whose access to the selected folder have to monitored. Alternatively, you can type “Everyone” to monitor every users’ accesses to this folder.
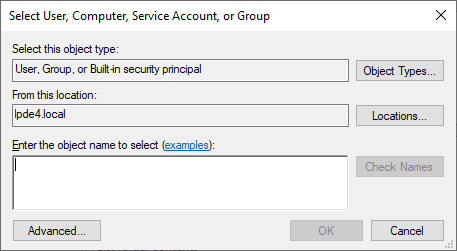
Figure 10: Select User for auditing - Click “OK” once you have made your selection of users. It takes you back to “Auditing Entry” window.
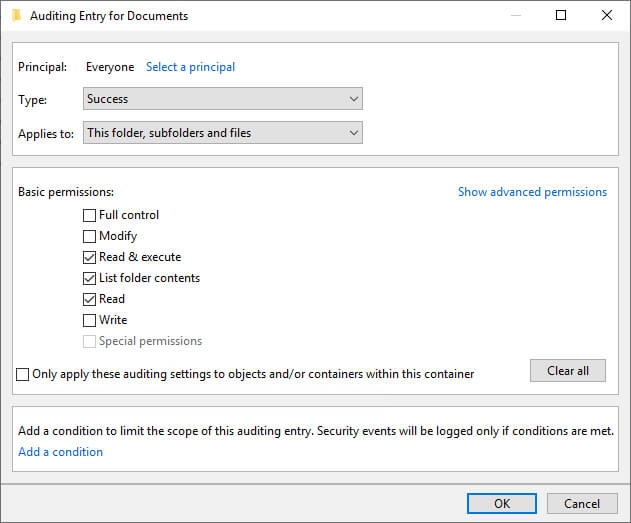
Figure 11: Auditing Entry for Documents settings - Select “Both” in “Type” drop-down menu to monitor both “Success” and “Fail” accesses made to the folder.
- In “Applies to” drop-down menu, select “This folder, subfolders, and files”.
- Select “Full Control” or the appropriate permissions for auditing. It is advised to click “Show Advanced Permissions” and select all permissions.
- You can use “Add a condition” link at the bottom to limit the scope of this auditing entry. You can add multiple conditions, if required. This way the auditing will generate limited logs.
- Click “OK” to save the settings and close “Auditing Entry for …” window.
- Click “Apply” and “OK” to close “Advanced Security Settings for” window.
- Click “OK” to close the folder properties.
3. Search Relevant Event IDs in Event Viewer
After auditing has been enabled, the logged events can be viewed in Event Viewer. The following image shows the logged event for a file access.
Key Event IDs for File and Folder Auditing:

How Lepide Auditor helps with File and Folder Auditing
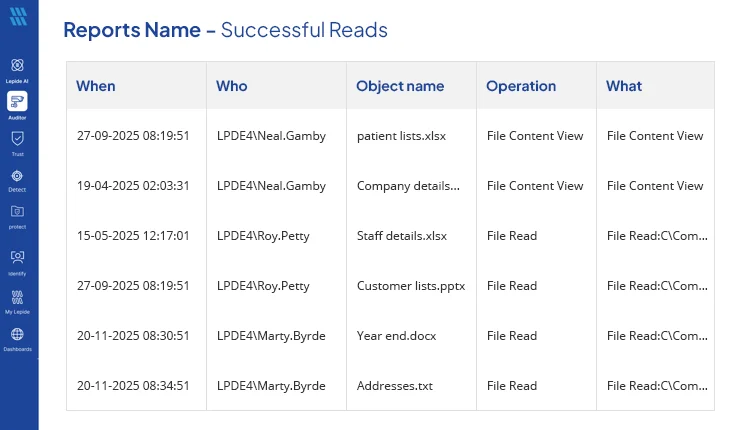
The Lepide File Server Auditor enables you to easily track any modifications being made to File Server, including files and folders themselves. You can track file copy events, file read attempts, file modifications, moves, creations, deletions and more with just the click of a button. You can also track whenever users attempt to read files (both successfully and failed attempts).
These reports take seconds to generate and provide all the critical file server auditing information that you need to detect potential threats or unwanted changes being made.
Native Auditing vs. Third-Party Solutions
Frequently Asked Questions
How long are audit logs retained by default?
Does enabling auditing impact server performance?
Can I audit multiple folders at once?
Why are my audit logs not appearing in Event Viewer?
Conclusion:
In this article, we have gone through the native process for configuring file and folder auditing. We have also shown you how much better our Lepide File Server Auditor is at doing the same job. Given the importance of security and compliance, it obvious that a specialized solution like Lepide’s File Server auditing software should be given preference over native auditing.