Active Directory user account auditing is the process of tracking and recording changes to user accounts within AD, including creations, deletions, modifications, lockouts, and password resets. This practice is crucial for ensuring the security, integrity, and accountability of an organization’s IT environment.
Key Takeaways
- Enable the “Audit User Account Management” policy via Group Policy on your Domain Controller
- Configure auditing through Advanced Audit Policy Configuration to minimize log noise
- Monitor key Event IDs: 4720 (created), 4722 (enabled), 4725 (disabled), 4726 (deleted), 4738 (changed), 4740 (locked out), 4781 (renamed)
- Use Event Viewer to filter and search Security logs for user account changes
- Consider third-party tools for centralized reporting and real-time alerts
Prerequisites
Before you begin auditing user account changes, ensure you have:
- Access to a Domain Controller
- Administrative privileges in Active Directory
- Administrative privileges in Active Directory
- Event Viewer access on the Domain Controller
Here are the key reasons why auditing AD user account changes is important:
User account changes, such as password resets, account lockouts, or privilege modifications, can be indicators of unauthorized access attempts or insider threats. Auditing these changes allows for the early detection of suspicious activities and potential security breaches, enabling organizations to take immediate action to mitigate risks and protect sensitive information.
In addition, many regulatory frameworks, including the Health Insurance Portability and Accountability Act (HIPAA) and the Sarbanes-Oxley Act (SOX), require organizations to maintain comprehensive audit trails of user account changes. Auditing user account changes helps demonstrate compliance with these regulations, ensuring that the organization’s IT environment is being monitored and controlled effectively.
In the event of a security incident or a compliance violation, auditing user account changes provides valuable forensic evidence. The audit logs can be used to reconstruct events, track the actions of specific users, and determine the root cause of the incident. This information is essential for conducting thorough investigations and implementing remedial measures.
Auditing user account changes also supports effective change management practices. It helps administrators track and verify modifications made to user accounts, ensuring that changes are authorized, properly documented, and comply with the organization’s policies and procedures. This facilitates better control over user access and reduces the risk of unauthorized changes or misconfigurations.
In this article, you will learn how to audit user account changes in Active Directory both natively and using Lepide Active Directory Auditor.
Audit Active Directory User Account Changes using Event Logs
Step 1: Enable “User Account Management” Audit Policy
Perform the following steps to enable “User Account Management” audit policy:
- Go to “Administrative Tools” and open “Group Policy Management” console on the primary “Domain Controller”.
- In “Group Policy Management”, create a new GPO or edit an existing GPO. It is recommended to create a new GPO, link it to the domain and edit.
- To create a new GPO, right-click the domain name in the left panel, and click “Create a GPO in this domain, and Link it here”. It shows the “New GPO” window on the screen. Provide a name (User Account Management in our case) and click “OK”.
- The new GPO appears in the left pane. Right-click it and click “Edit” in the context menu. “Group Policy Management Editor” appears on the screen.
- In this window, you have to set “Audit User Account Management” policy. To do that, navigate to “Computer Configuration” ➔ “Windows Settings” ➔ “Security Settings” ➔ “Advanced Audit Policy Configuration” ➔ “Audit Policies”.
- Select “Account Management” policy to list all of its sub-policies. Double-click “Audit User Account Management”’ policy to open its “Properties” windowNote: Instead of configuring “Local Policy, it is recommended to configure above policy in “Advanced Audit Policy Configuration”. This is because you have to enable all account management policies in “Local Policy” that will generate huge amount of event logs. To minimize the noise, “Advanced Audit Policy Configuration” should be preferred.
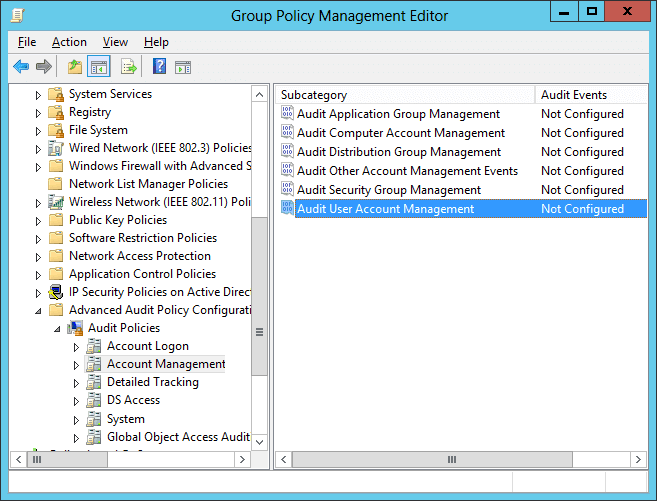
Figure 1: The “Audit User Account Management” policy - In policy properties, click to select “Define these policy settings” checkbox. Then, select the “Success” and the “Failure” attempts check boxes. You can choose any one or both the options as per your need. In our case, we have selected both of the options as we want to audit both the successful and the failed attempts.
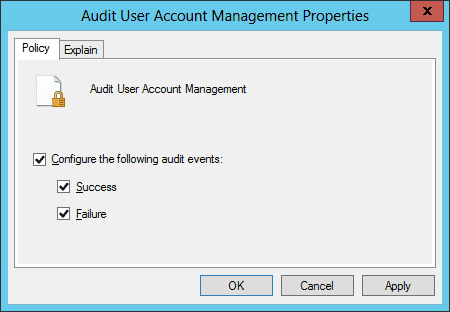
Figure 2: Properties of “Audit User Account Management” policy - Click “Apply”, and “OK” to close the properties window.
- It is recommended to update the Group Policy instantly so that new changes can be applied on the entire domain. Run the following command in the “Command Prompt”:Gpupdate /force
In the following image, you can see the “Gpupdate” command run.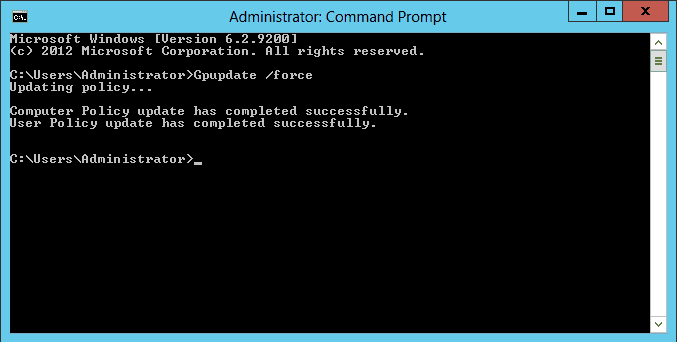
Figure 3: Updating the Group Policy
Step 2: Search Relevant Event IDs to Track User Account Changes
To track user account changes in Active Directory, open “Windows Event Viewer”, and go to “Windows Logs” ➔ “Security”. Use the “Filter Current Log” option in the right pane to find the relevant events.
The following are some of the events related to user account management:
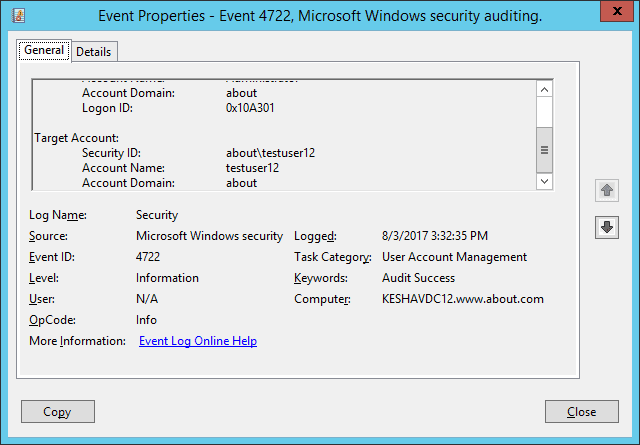
In our lab environment, we have enabled a disabled user account. The following image shows the event’s properties window’s screenshot (event Id 4722). The user’s name who enabled the account is shown under “Subject ➔ Account Name” field, and the account-enable time is displayed under “Logged” field.
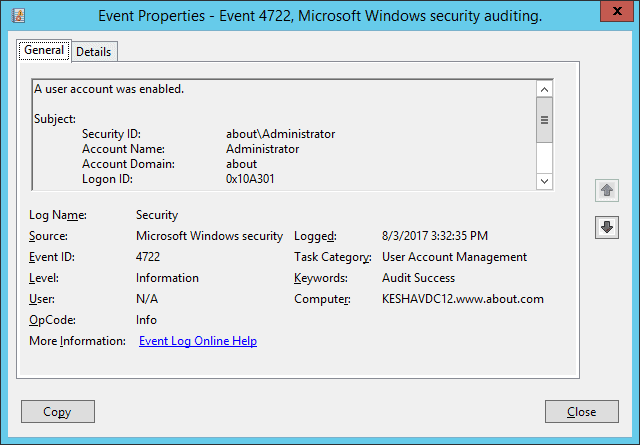
To see the user’s name whose account was enabled, you will have to scroll down the event’s property window’s side bar. In the following image, you can see the user’s name under “Target Account ➔ Account Name” field.
Quick Reference: Native Auditing Steps
- Open Group Policy Management Console on the Domain Controller
- Create and link a new GPO to the domain
- Navigate to Advanced Audit Policy Configuration → Account Management
- Enable “Audit User Account Management” for Success and Failure events
- Run Gpupdate /force to apply changes immediately
- Open Event Viewer and navigate to Windows Logs → Security
- Filter logs by relevant Event IDs (4720, 4722, 4725, 4726, 4738, 4740, 4781)
How Lepide Active Directory Auditor Tracks User Account Changes
Often cited as being both quicker and easier than native auditing methods, Lepide Active Directory Auditor enables you to track user account changes in your Active Directory in a much better way.
Lepide presents critical information about user account changes in Active Directory, including when a user account was created, deleted, locked out, disabled, deleted, changed, or when the name of an account was changed. All of this information is presented in easy-to-read, filterable, searchable and sortable reports.
The following example shows the “User Status Modifications” report. All audit information about a when the status of a user account has changed is shown in a single line record:
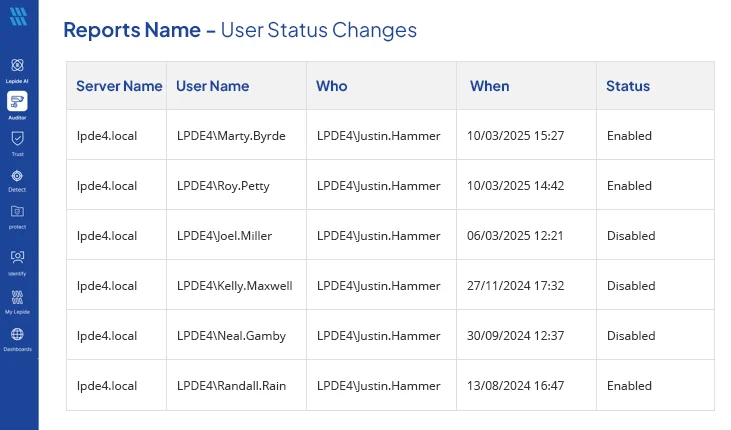
In the above image, you can see that the status of one particular user has changed multiple times. We can see all the important audit information, including the user name, who made the change, when it happened, the current status, and more.
The below image shows user created, deleted and more changes report
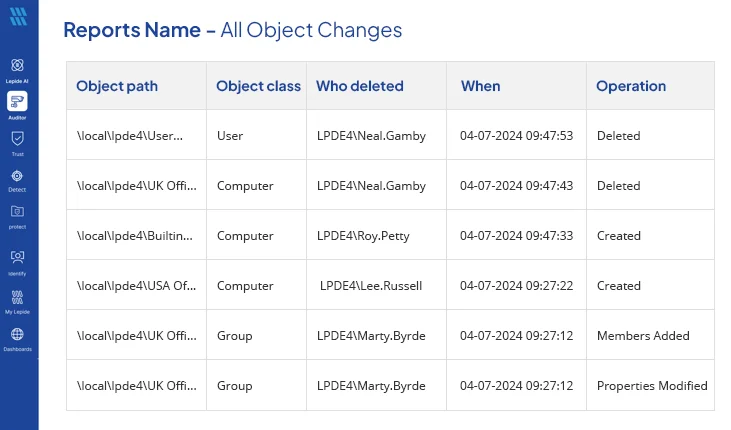
Figure 7: “User Created and Deleted” report
Native Auditing vs. Third-Party Tools
Native auditing limitations
- Logs are decentralized across multiple Domain Controllers
- Searching and correlating events is time-consuming
- No real-time alerts for critical changes
- Limited reporting and visualization options
- Requires manual log management and archival
Third-party tool benefits
- Centralized audit data from all Domain Controllers
- Pre-built reports with filtering and sorting capabilities
- Real-time alerts for suspicious activities
- Simplified compliance reporting
- Long-term log retention and searchability
Conclusion
In this article, we’ve shown you how to detect user account changes in Active Directory through native auditing. You’ve also had the pleasure of seeing a glimpse of what our award-winning Lepide Active Directory Auditor can do to simplify Active Directory auditing.