Delegating rights to unlock accounts in Active Directory allows organizations to grant specific users or groups—such as help desk staff—the ability to unlock locked user accounts without requiring full administrative privileges. This supports the principle of least privilege, improves help desk efficiency, and reduces the burden on IT administrators when account lockout policies trigger.
Quick Summary
- Edit the dssec.dat file to expose the lockoutTime attribute
- Open the Delegation of Control wizard in Active Directory Users and Computers
- Select the target user or group
- Choose “Create a custom task to delegate”
- Select User objects
- Enable Read lockoutTime and Write lockoutTime permissions
- Complete the wizard
Prerequisites
Before starting, ensure you have:
- Administrative access to Active Directory
- Access to the dssec.dat file located at %windir%\System32\
- Target Organizational Unit (OU) or domain identified for delegation
Compatibility
This procedure applies to Windows Server 2016, 2019, and 2022. The dssec.dat file location and behavior remain consistent across these versions.
In this article, we will go through the steps needed to delegate account unlocks using “Active Directory Users and Computers” console. If you want to delegate account unlocks to a particular user or a group in Active Directory, you will first have to make the right visible in this console.
All the rights attribute that can be made visible in Active Directory Users and Computers are stored in the “%windir%\System32\dssec.dat” file. The rights’ attributes are grouped under headings surrounded by square brackets (for example, [user], [computer] etc.). The value filter for each attribute is:
To modify the filter, open dssec.dat file in Notepad. Under the [user] heading, find the lockoutTime attribute. Change the value of the filter to 0 (lockoutTime=0), by default the value is 7. Save the changes and close the file.
Steps for Delegating the Unlock Account Rights
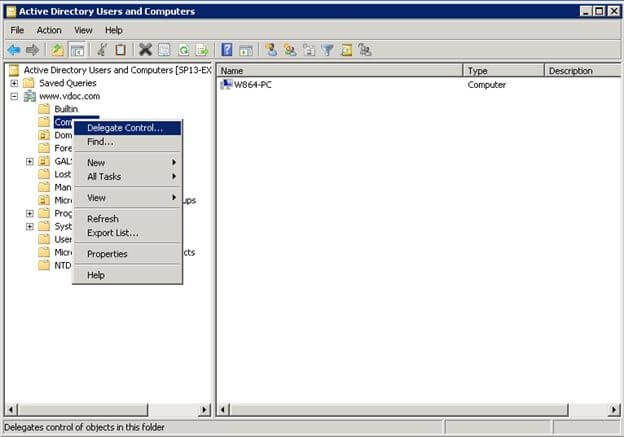
- Open “Active Directory Users and Computers”
- Right-click the Organizational Unit or domain in “Active Directory Users and Computers”. From the context menu, select “Delegate Control”
- “Delegation of Control” wizard opens up. Click Next on the Welcome dialog box to proceed
- Click “Add” to select the user/group to which the right will be assigned. Type the name of user or group you want to add and click “Check Names” button to verify it
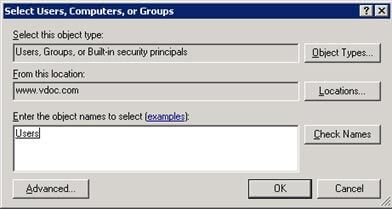
This takes you back to the wizard. Click “Next” to go to the next page.
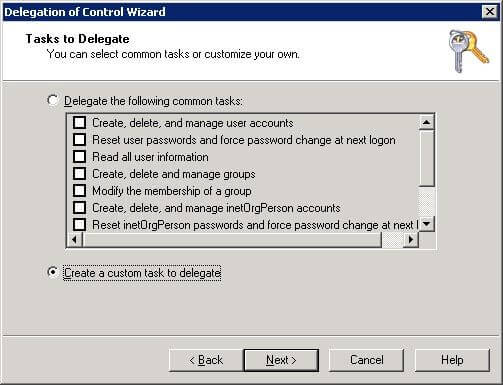
- In this step, you will have to choose the tasks. Select the 2nd radio button, Create a custom task to delegate, and click Next
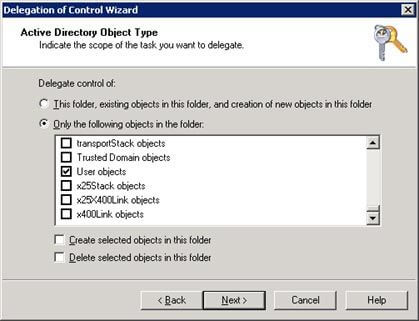
- Select the 2nd option, which is Only the following objects in the folder. Select User objects in the list, and click Next
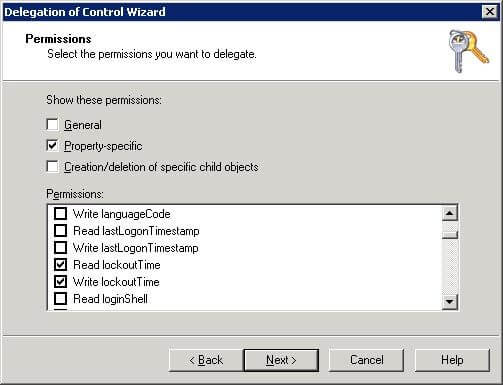
- Select the Property-specific checkbox and ensure that only this checkbox is selected
In the Permissions list, check both the Read lockoutTime and Write lockoutTime boxes, and click Next.
- On the Completing the Delegation of Control Wizard dialog box, click Finish to close the wizard
Security Considerations
When delegating unlock rights, follow these best practices:
- Apply the principle of least privilege—grant only the permissions necessary for the task
- Use dedicated security groups rather than individual user accounts for delegation
- Avoid over-delegating permissions that could expose sensitive account attributes
- Regularly audit delegated permissions to ensure they remain appropriate
Troubleshooting
lockoutTime permission not appearing in the wizard: This indicates the dssec.dat file wasn’t modified correctly. Verify that you changed the lockoutTime value to 0 under the [user] heading and saved the file.
Delegation not working: Check inheritance settings on the target OU. If inheritance is blocked, the delegated permissions may not apply to child objects.
How to Unlock a User’s Account
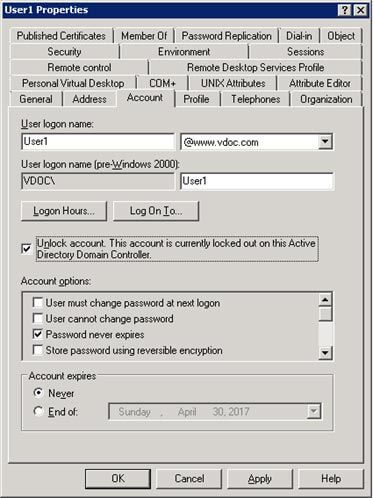
To unlock a user’s account, first login to the system. Open Active Directory Users and Computers. Right-click on the User whose account you need unlocked and select Properties from the context menu. In the Properties window, click on the Account tab. Select the Unlock Account checkbox. Here you will find written that this account has been locked in this ADDC. Click Apply and OK to unlock the account.
How Lepide’s Free Tool Helps with Account Unlocks
In this article, we have gone through the steps by which you can delegate the Account Read lockoutTime and Write lockoutTime right to a user or a group for a given domain or OU. As account policies are domain-specific, this account lockout policy will be implemented in the entire domain. However, this delegation will not affect rights or policies in other domains, even in the domains of the same forest or if this domain is a forest’s root.
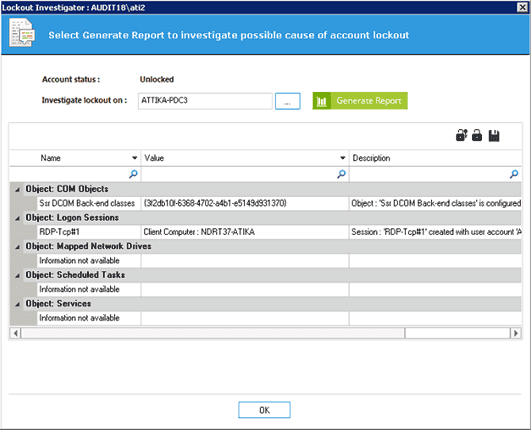
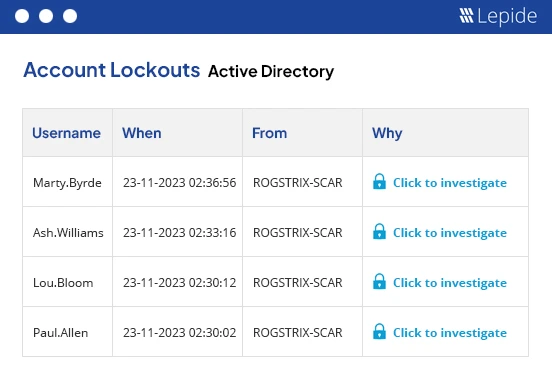
Lepide Account Lockout Examiner (Free Tool) can help you to find locked accounts, their source and unlock them.
Instant Account Lockout Detection
Continuously monitor your Active Directory to identify account lockouts as they happen, enabling faster troubleshooting.
Remote Account Unlocking
Effortlessly restore access by unlocking locked user accounts directly through the tool’s interface.
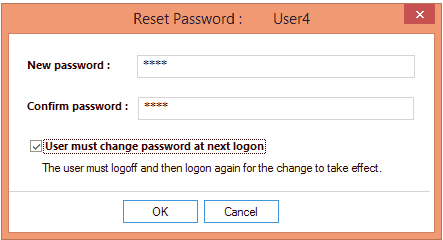
Password Reset Remotely
Conveniently change user passwords from within the tool, with options to enforce password policies.
Investigate – Endpoint Credential Scanning
Examine endpoints for stored credentials like system services, mapped drives, and logon sessions that might trigger lockouts.