Real time alerts are an essential tool to enable organizations to instantly detect and respond to potential attacks. Without real-time alert mechanisms in place for all significant security changes, inappropriate access to network resources may not be detected soon enough to stop an attack. The longer a malicious activity goes unnoticed, the greater the potential impact on the organization. However, once an alert has been triggered, immediate action can be taken to reduce risk and mitigate damage.
In this guide, we will look at two methods for setting up alerts in Active Directory: the native method and the Lepide Auditor for Active Directory.
Set Up Alerts in Event Viewer for Active Directory
The required audit policies need to be enabled and this is explained in the steps below:
- Identify the Active Directory events that you want to monitor.
- Launch Server Manager.
- Under Tools, select Group Policy Management, and launch the Group Policy Management console.
- Navigate to Forest, Domain, Your Domain, Domain Controllers
- Create a new Group Policy Object (GPO) and link it to the domain containing the user object.
- Depending on the events that you would like to monitor, navigate accordingly, and select the policies you want to enable for both successful and failure events.
- Click Apply and OK to close the Properties window.
- To enforce these changes throughout the domain, run the command gpupdate /force, in the Run console.
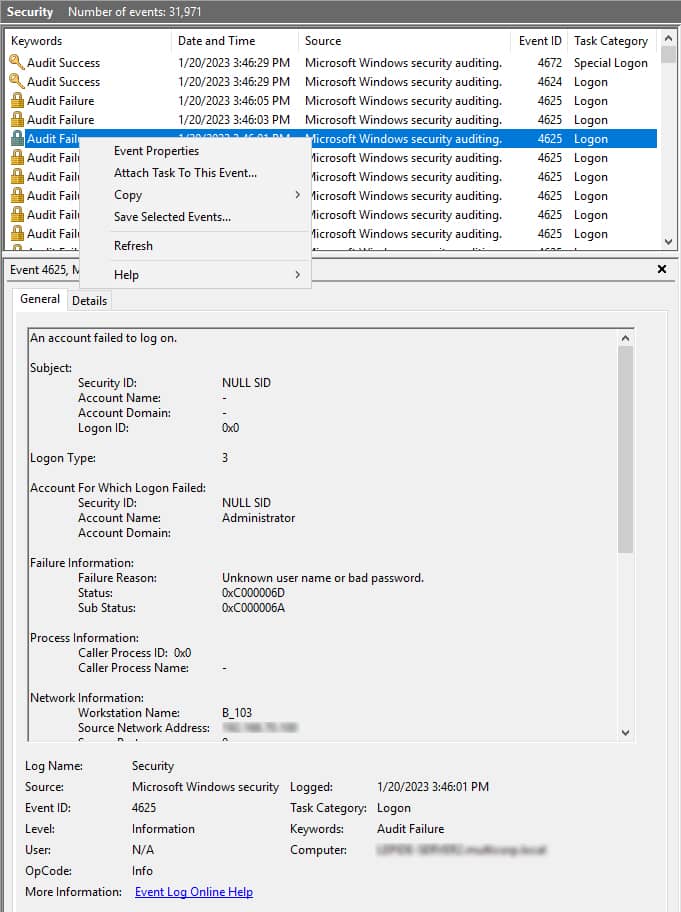
To enable alert notifications in Event Viewer – Once auditing has been enabled, each time a particular event occurs, an entry is made in the Event Viewer. You can setup alerts by following the steps below:
- Click on Start, Administrative Tools, Event Viewer
- Choose Windows Logs and select Security. You will see all the events logged in security logs.
- Use Find option to search for the event you are looking for.
- Right-click on the event and select Attach Task to this Event.
- Follow the steps in the Create Basic Task Wizard.
- The Action section of the wizard lets you perform three operations:
- Start a Program
- Send an e-mail
- Display a message
- To Start a Program, save the code to be executed when the event occurs as a PowerShell script with a .ps1 extension.
- Specify the path to the script in the Program/Script field.
- You can setup an e-mail or message notification by entering the necessary details such as the message to be displayed, SMTP server, sender, and receiver’s e-mail addresses.
- Click Finish.
These steps need to be repeated for each event in the Active Directory environment where an alert is required. Manually setting up alert notifications like this for every event is time-consuming and inefficient. An alternative solution to this way of setting up alerts is to use the Lepide Auditor for Active Directory.
Using the Lepide Auditor for Active Directory to Configure an Alert
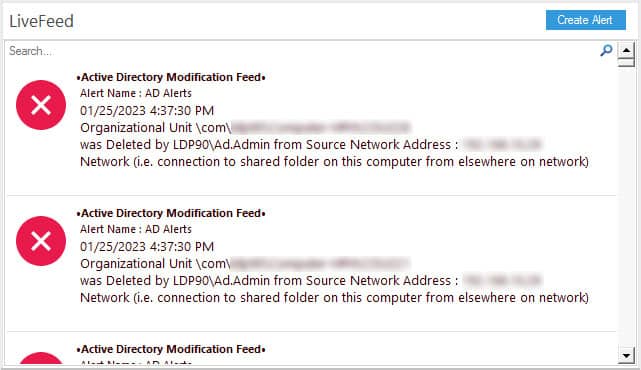
Using the Lepide Auditor for Active Directory, you can create real-time alerts for critical and wanted changes which administrators, or selected recipients, can then receive as email notifications, LiveFeed updates, and as push-notifications on the Lepide mobile application.
Alerts can be generated based on several factors. These could be:
- a single event
- pre-defined criteria (such as time and date)
- threshold-based criteria
Below is an example of a Threshold Alert on the Lepide Dashboard:
Alerts can be configured to execute a customized script whenever a selected change is detected. Scripts can be of the following types:
- VB Script
- PowerShell Script
- Batch File
Using custom script execution, you can, shut down users, and servers and take other actions to mitigate the effects of a security breach.