System administrators frequently need to map network drives and one way to achieve this is to create a batch script which runs every time the workstation starts. However, a simpler and more convenient method is to use Group Policy. Mapping network drives through Group Policy is faster and easier, so it is a much more scalable method. In this guide we will look at the native way to use Group Policy to map network drives.
Steps to Map Network Drives
Please follow below steps for drive mapping using Group Policy:
Step 1: Create and Link a new GPO
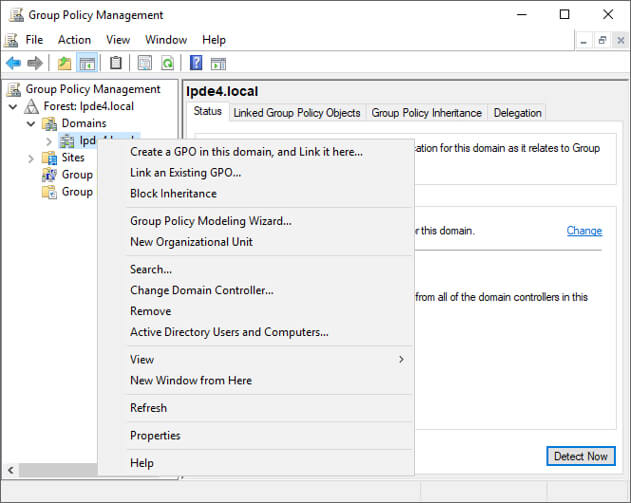
- Open the Group Policy Management Console
- In the Group Policy Management Console, right click and select “Create a GPO in this domain, and Link it here”. Name the GPO and then link it to an OU that contains user accounts because Group Policy drive mapping is a user configuration preference. You can also select an option – create a GPO in this domain and link it here, after that use item-level targeting option which will be described below.
Step 2: Configure GPO Settings
- On the GPO right click and select Edit
Step 3: Drive Mappings
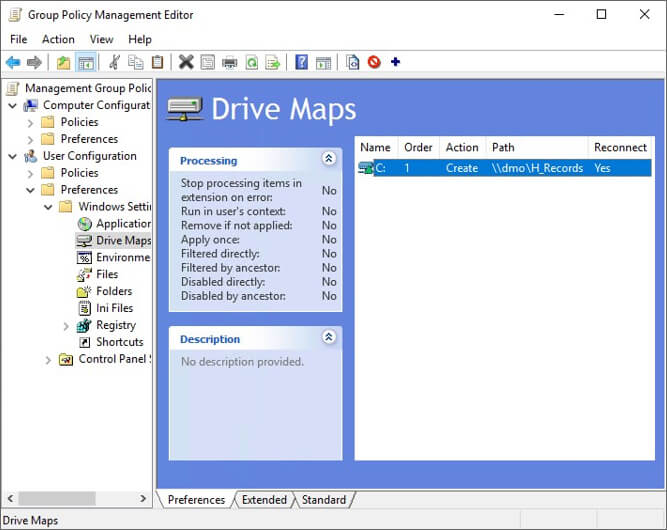
- Navigate to User Configuration, Preferences, Windows Settings, Drive Mappings
Step 4: Create a New Mapped Drive
- Right click Drive Mappings, select New, Mapped Drive
Step 5: Configure the Mapped Drive Settings
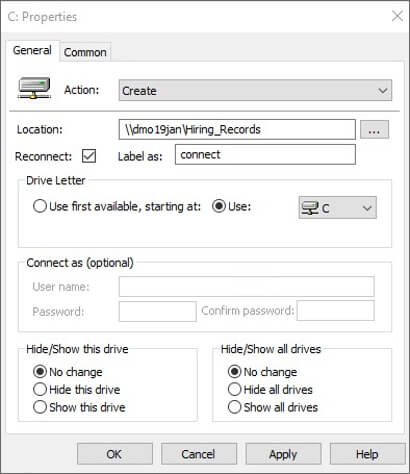
The next step is to configure the Drive Mapping Properties. Here are the options available on the General tab:
-
- Action — Select an action that will be performed on the shared drives:
- Location — Specify the path to the shared folder or drive that you want to map.
- Reconnect — Check this option if you want to save the mapped drive in the user’s settings and reconnect it each time they log on.
- Label as — Specify a custom name for the shared drive. (You can leave this field blank.)
- Drive Letter — Specify the letter you want the drive to be mapped to. Be careful, because if the workstation is already using the letter you choose here, the Group Policy drive mapping will fail.
- Connect as — If this setting is blank, the drive will be mapped using the current user account credentials. You can choose to specify a different account here that will be used instead.
- Hide/Show options — You can also choose to connect the new drive (or all drives) in a hidden state.
Step 6: Configure additional settings
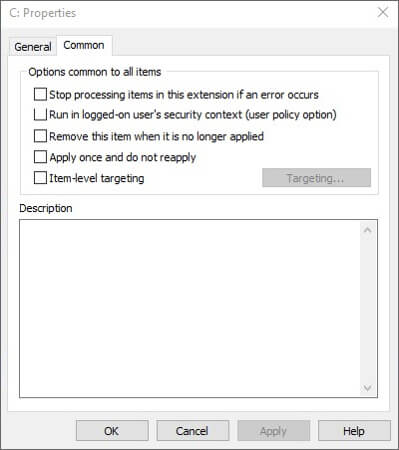
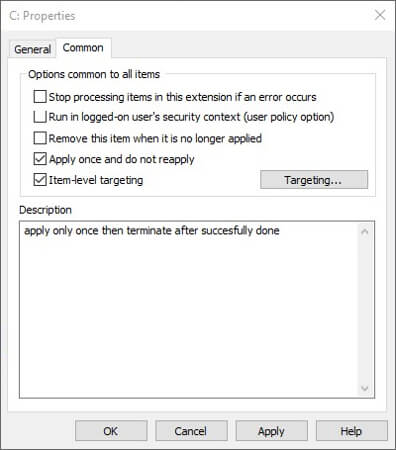
Click the Common tab to configure these additional settings for all items
-
-
- Stop processing items in this extension if an error occurs
- Run in the security context of the user who is currently logged on
- Remove this item when it is no longer applied
- Apply once and do not reapply
- Item-level targeting (see step 7)
-
Step 7: Item-level Targeting
Item-level targeting allows you to apply drive mappings in a very flexible way. For example, you could apply a drive mapping only to a certain OU and the users and computers in it, or just to a certain IP address range.
To enable item-level targeting:
-
-
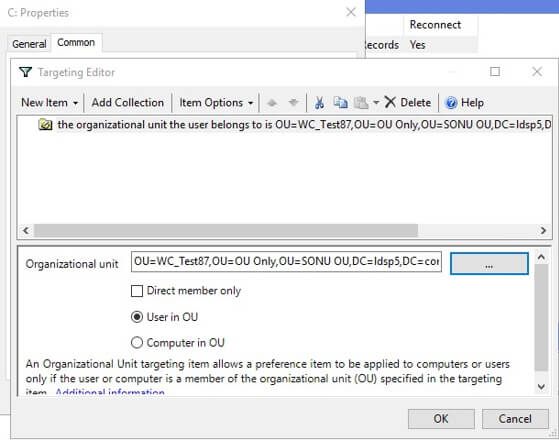
- Click the Targeting button to open the Targeting Editor
- Click New Item and select the type of item that you want to apply the new shared drive mapping policy to
- The screenshot below shows how to select an Organizational Unit and then choose the specific users or computers in that OU
- Click OK to close the Targeting Editor
-
Step 8: Apply the Policy
To apply the policy, either reboot the target computers or run gpupdate /force on them.
Alternatively, you can go to Group Policy Management, right-click the target OU, and then click Group Policy Update
Now, whenever a user logs on to any of the targeted computers, the new network drive will be shown in their file explorer.
As you can see, mapping a network drive via Group Policy is a very straightforward process and doesn’t require any PowerShell scripting experience. It is the best way to assign network drives to your users in a centralized manner, and makes troubleshooting easier.
How Lepide Helps
Lepide Group Policy Auditing tool can help you to get more visibility over the changes being made to your Group Policy Objects. Every change will be monitored and when a critical change is made, the administrator will receive a real-time alert and have the option to roll back unwanted changes to their previous state, allowing administrators to maintain a policy of least privilege and ensure the security policies of the organization remain intact.