Group Policy Objects (GPOs) are helpful when it comes to enabling access to shared resources and devices, allowing essential functions and establishing secure environments. If all your employees can use the internet, work with their data, log into their systems and use peripheral devices, it is because of the GPO. If a GPO is deleted without the knowledge of the admin, all these activities will be obstructed and the resulting increase in the vulnerability of your systems may lead to unauthorized access. Therefore, it is important to track all GPO modifications and deletions.
In this article, I will show you how to track who deleted a GPO using native methods.
Steps to Track Who Deleted a GPO using Native Auditing
Perform the following steps:
Step 1 – Edit a New or Existing Group Policy Object
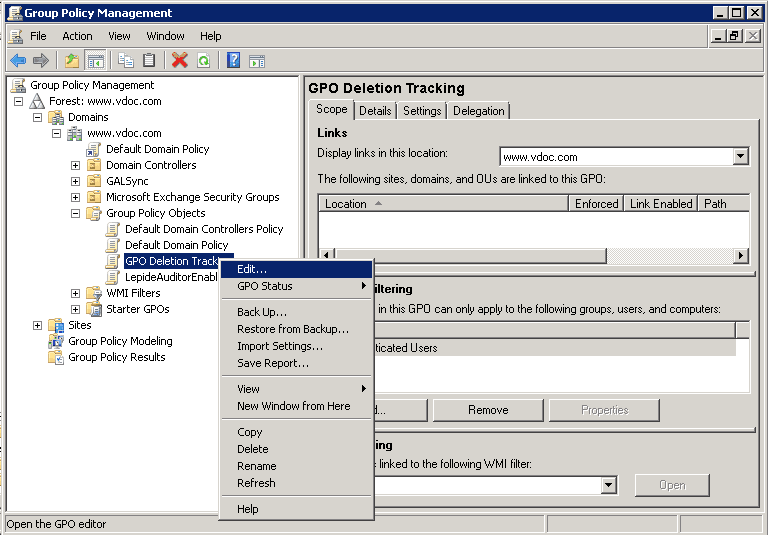
- Open “Group Policy Management Console”.
- Create a new group policy object at the domain controller level and provide a name to it.
- Right-click on the policy and click “Edit”.
NOTE: You can also modify an existing Group Policy Object.
Step 2 – Configure File System Auditing
Perform the following steps:
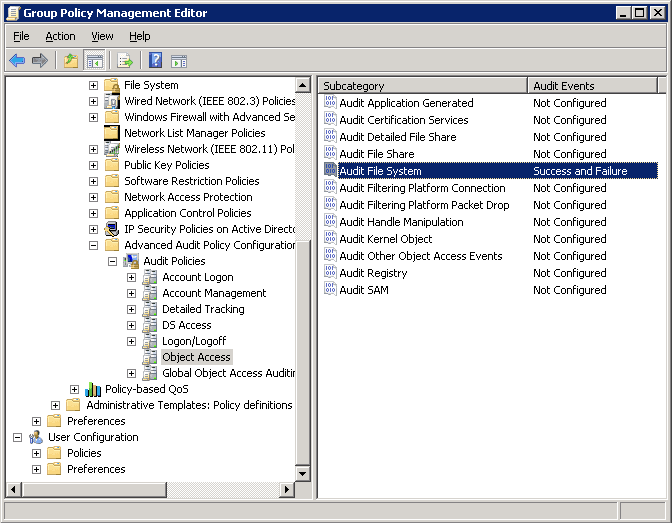
- Go to “Computer Configuration” → “Policies” → “Windows Settings” → “Security Settings” → “Advanced Audit Policy Configuration” → “Audit Policies”.
- Select “Object Access” to list all its policies in the right pane.
- Right-click “Audit File System” and click “Properties” to access its properties.
- Select “Configure the following events” checkbox, and then select both “Success” and “Failures” checkboxes.
- Click “Apply” and “OK”.
Step 3 – Configure Audit Handle Manipulation
Perform the following steps:
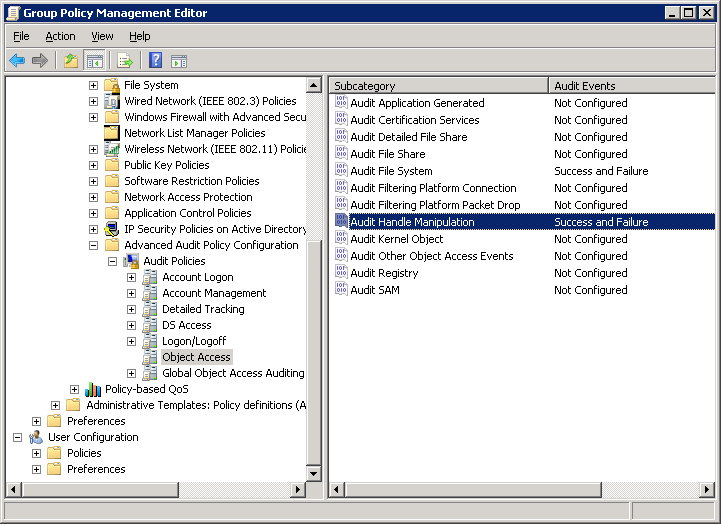
- Go to “Computer Configuration” → “Policies” → “Windows Settings” → “Security Settings” → “Advanced Audit Policy Configuration” → “Audit Policies”.
- Select “Object Access”. All of its policies are listed in the right pane.
- Right-click on “Audit Handle Manipulation” in the right pane and click “Properties”.
- Select the “Configure the following audit events” checkbox.
- Select “Success” and “Failure”.
- Click “Apply” and “OK”.
Step 4 – Configure Directory Service Access Auditing
Perform the following steps:
-
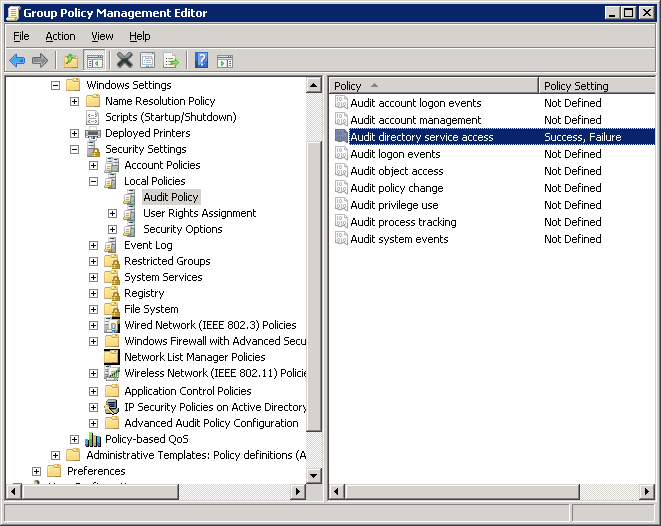
- Go to “Computer Configuration” → “Policies” → “Windows Settings” → “Security Settings” → “Local Policies” → “Audit Policy”. It lists all of its policies in the right panel.
- Right click on “Audit directory service access” in the right pane select “Properties”.
- Select “Define these policy settings” checkbox to enable it.
- Select “Success” and “Failure” checkboxes.
- Click “Apply” and “OK”.
Step 5 – Configure Event Log Policies
Perform the following steps:
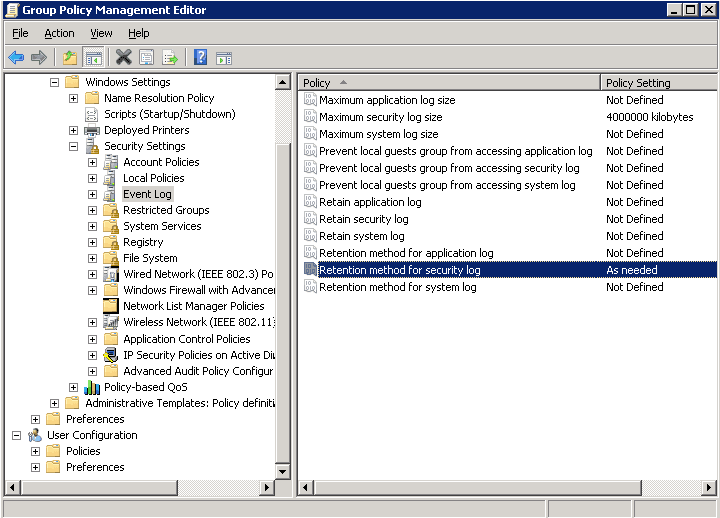
- Navigate to “Computer Configuration” → “Policies” → “Windows Settings” → “Security Settings” → “Event Log”. All of its policies are listed in the right panel.
- Right-click on “Maximum security log size” and select “Properties” from the context menu.
- Select “Define this policy setting” checkbox and set the value to 4000000 Kilobytes that is 4 GB.
- Click “Apply” and “OK”.
- Now, right-click on “Retention method for security log” and select “Properties” from the context menu.
- Select “Define this policy setting” checkbox and select “Overwrite events as needed” option.
- Click “Apply” and “OK”.
Step 6 – Configure Auditing Entries Using ADSIEdit
Perform the following steps:
- Open ADSI Edit by running “AdSIedit.msc” and connect to “Default naming context”.
- Expand its top node “DC=www,DC=domain,DC=com” node in the left pane.
- Expand “CN=System” and select “CN=Policies”.
- Right-click on it and select “Properties” from the context menu.
- Go to “Security” tab and click on “Advanced”.
- Navigate to “Auditing” Tab and Click “Add”. It shows “Select User” dialog box.
- Type “Everyone” in “Enter the object name to select” textbox.
- Click “Check Names” button. It validates the name.
- Click “OK” once done. It shows “Auditing Entry for Policies” window on the screen.
- Select “This object and all descendant objects” in the “Apply onto” drop-down menu.
- Check “Successful” box for “Delete groupPolicyContainer objects”.
- Click “OK and it takes you back to “Auditing” tab of “Advanced Security Settings for Policies” window.
-
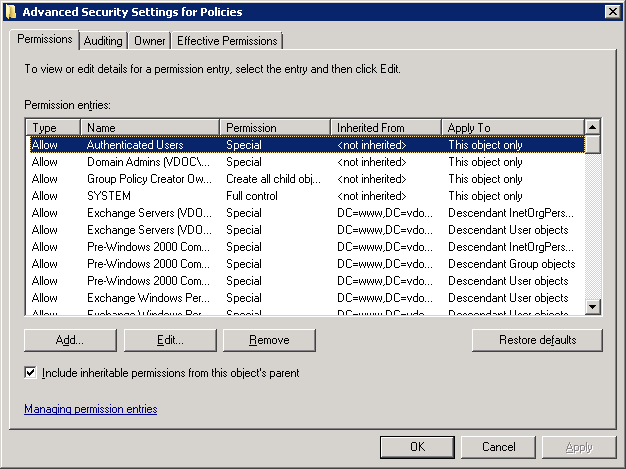
- Click “Apply” and “OK”. It takes you back to “Security” tab of “CN=Policies Properties” window.
- Click “Apply” and “OK” again.
- Close “ADSI Edit”.
Step 7 – Configure SYSVOL Folder Properties
Perform the following steps:
-
- Navigate to the \\domainname\sysvol\domainfqdn. Here “domainname” can be replaced with the name of domain controller.
- Right-click “Policies” folder and select “Properties”.

-
- Select the “Security” tab and click “Advanced” button.
- Go to “Auditing” tab. Click “Edit” to edit auditing properties.
- Click “Add” to add a new principal for auditing.
- Type “Everyone” in the “Enter the object name to select” textbox.
- Click “Check Names” to validate the name.
- Click “OK” once done. It shows “Auditing Entry for Policies” window.
- Select “This folder, subfolders and files” in the “Apply onto” drop-down menu.
- Click “Successful” checkboxes for “Write attributes”, “Write extended attributes”, “Delete”, and “Delete subfolders and files”.
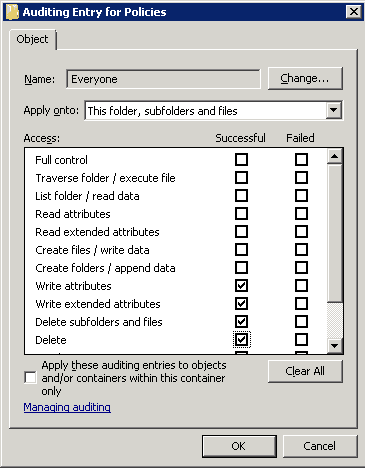
- Click “OK” to close this window. It takes you back to “Auditing Security Settings for Policies” window that now shows the newly selected entry.
- Click “Apply” and “OK”. It takes you back to “Auditing Security Settings for Policies”.
- Click “Apply” and “OK”.
- Click “Apply” and “OK” again at “Policies Properties” window.
- Close the folder.
Step 8 – Viewing GPO Deletion Event
After you have configured auditing for GPO deletions, you can look for the GPO deletion event (ID 5141) in the Event Viewer. The following image shows the GPO deletion event with all the necessary information.
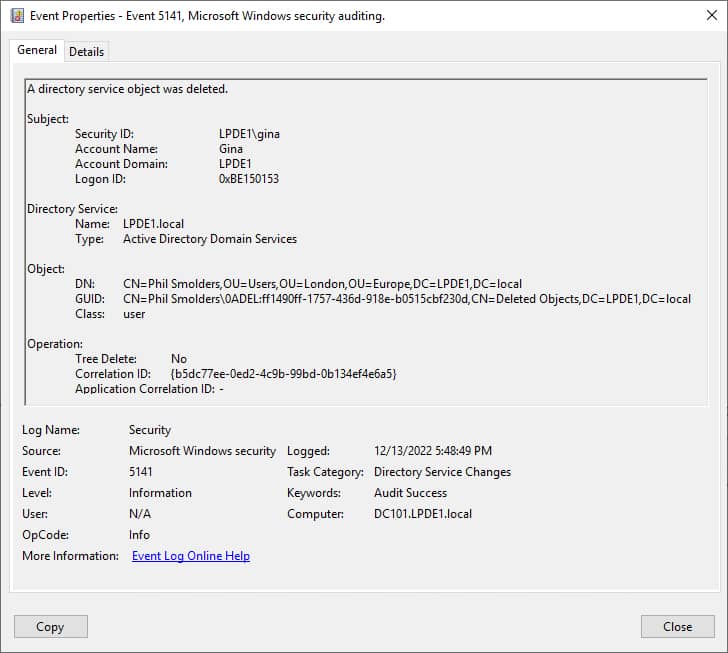
However, using the Event Viewer to obtain information about every GPO deletion event is a laborious and time consume way of doing things. Lepide Group Policy Auditor provides an easy alternative for GPO delete auditing.
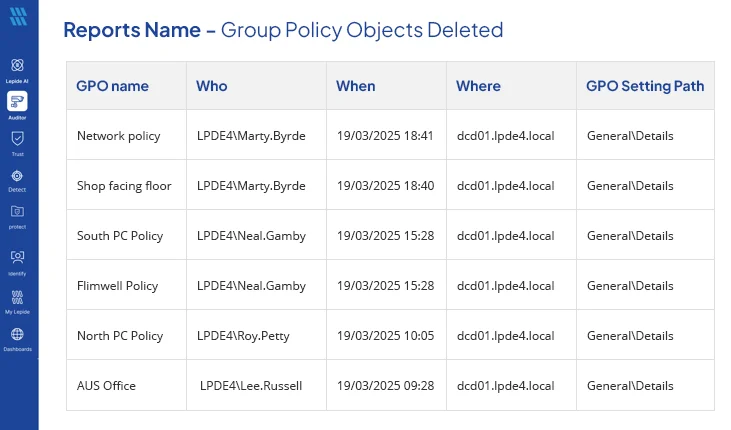
Monitoring GPO Deletion with Lepide Group Policy Auditor
The following image shows the GPO deletion event as seen in Lepide Group Policy Auditor (part of Lepide Data Security Platform). As you can see, the answers to the ‘who, what, when, and where’ questions, essential for auditing, have been given in one place and in an easy-to-read format.
Conclusion
In this article, we have seen how to configure auditing for a GPO deletion event natively and how to view the event in the event viewer. We have also seen an easier alternative for monitoring GPO deletion events in Lepide’s Group Policy Auditing solution. Which method you go for will ultimately depend on the amount of resources and time you wish to devote to performing important tasks like this.