Tracking Active Directory user and computer account deletions is an important part of your IT security plan. It’s possible your organization has hundreds of Active Directory user and computer accounts to manage. If a user account is deleted, it means that that particular user is barred from accessing data, services, systems and network resources. Similarly, if a computer account is deleted, that particular computer may not be able to use the server programs. Usually, old user and computer accounts have to be deleted in order to clean up Active Directory and eliminate potential security threats, but occasionally a functional user/computer account can get deleted, which can obstruct the normal functionality of the IT environment.
So, can you see why it is important to keep track of all account deletions in your Active Directory? In this article, I’m going to show you the steps you need to take to track user and computer account deletions in your IT infrastructure. We’re going to have a look at both native methods and using our auditing solution; Lepide Active Directory Auditor (and you can decide which one you prefer!).
Steps to Track User and Computer Accounts Deletion with Native Auditing
Step 1: Use “ADSI Edit” to enable auditing
To track deleted user and computer accounts, you have to enable the auditing in Active Directory Service Interface (ADSI). Perform the following steps:
- Type “ADSIEdit.MSC” in “Run” box or in “Command Prompt”. Press “Enter” key and open its console.
- Right-click top most node in left panel (“ADSI Edit”).
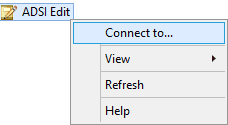
Figure 1: Right-click on “ADSI Edit” - Click “Connect to” to open “Connection settings” window.
- In “Connection Settings” window, click “Select a well known Naming Context” and select “Default Naming Context” in the drop-down menu.
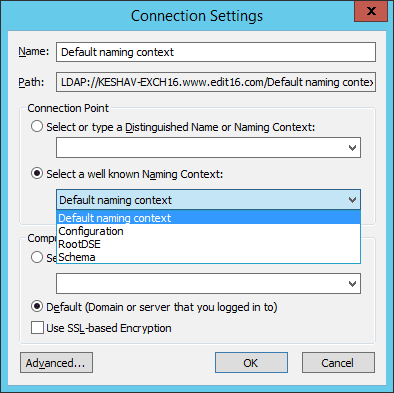
Figure 2: “Connection Settings” window - Click “OK”. It establishes the connection with Default Naming Context and display its tree structure in the left panel.
- Expand “Default Naming Context” to access the very first node titled “DC=www,DC=domain,DC=com”.
- Right-click it and select “Properties” to access its properties.
- Switch to “Security” tab.
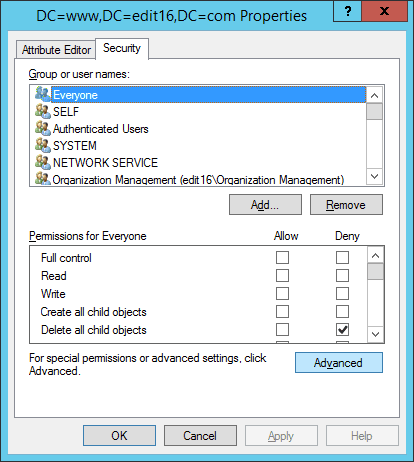
Figure 3: “Security” tab in “Properties” - To access “Advanced Security Settings” window click “Advanced”.
- Switch to “Auditing” tab.
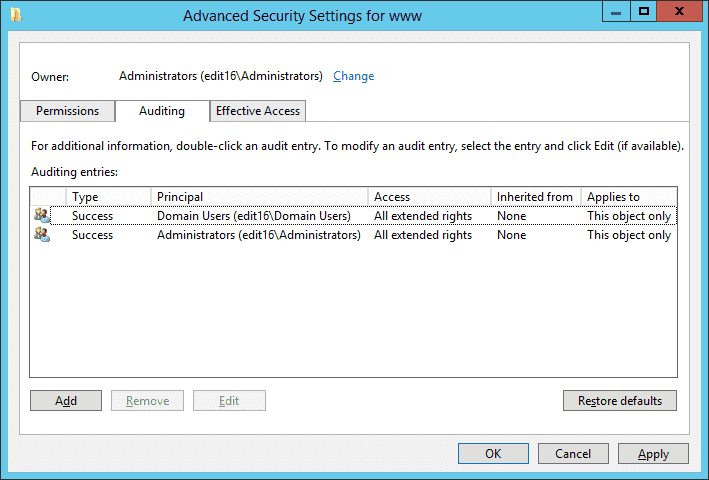
Figure 4: Advanced Security Settings Window Here, add the auditing entry for the users whose actions you want to monitor. If the auditing entry is already added then you can skip this step.
- Now, click “Add” to add an auditing entry if it does not exist already
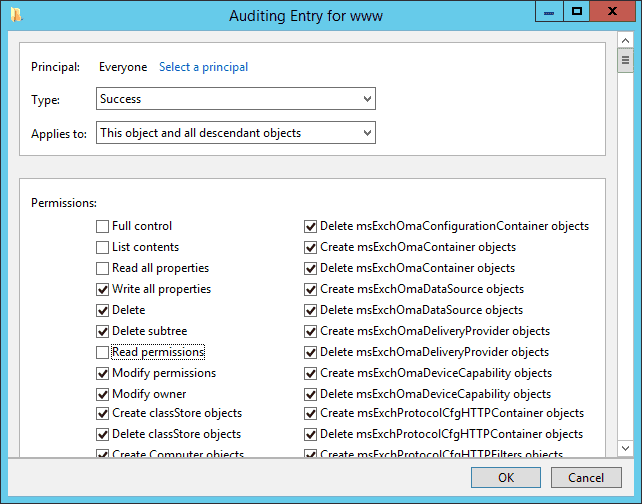
Figure 5: Auditing Entries - Click “Select a Principal” to access the window to add the users, whose actions you want to audit.
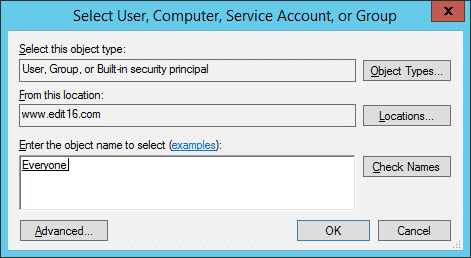
Figure 6: Select user - If you want to audit the activities of every user and object in the network, type “Everyone” in the text box. Else you can type the username such as Administrator
- Click “Check Names” to verify the name.
- Click “OK” to add the entered user or object. It takes you back to “Auditing Entry” window.
- Select “Type” as “All” in its drop-down menu.
- Select “Applies to” as “This object and all descendant objects” in its drop-down menu.
- Select all permissions by clicking checkboxes except the following:
- “Full Control”
- “List Content”
- “Read all properties”
- “Read Permissions”.
- Now click “OK” to add the auditing entry. It takes you back to the “Advanced Security Settings” window, which now displays the auditing entry, “Everyone” with these permissions.
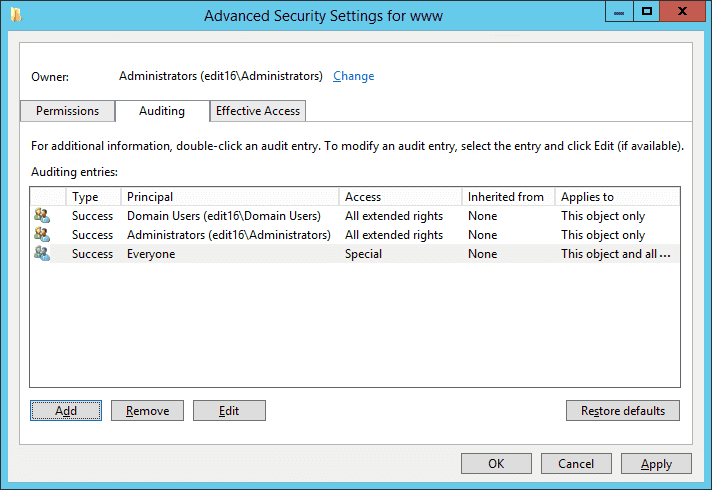
Figure 7: Window displaying auditing entries - Click “Apply” and “OK” to close this window. It brings you back to “Security” tab of the object properties.
- To close object properties, click “Apply” and “OK”.
- Close the “ADSI Edit” window.
Step 2: View Events in Event Viewer to Check Deleted User Accounts and Computers in AD
Once you have enabled auditing, deleted computer and user objects will be logged in the Event Viewer. Perform the following steps to view the events:
- Open “Event Viewer” console and go to “Windows Logs” ➔ “Security”.
- Search for the event ID 4726 (AD User/Account deleted event id) and event ID 4743 (Computer account deleted event id). These event IDs identify the user and computer account deletions.
The following screenshots shows the Event ID 4726 for user account deletion.
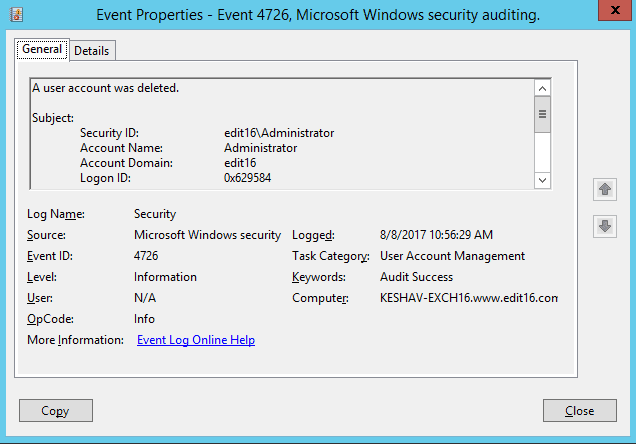
Figure 8: Event Properties – User Account deletion You can scroll down to view which user account was deleted.

Figure 9: Displaying deleted user details Similarly, the following screenshot of Event ID 4743 shows a deleted computer account.
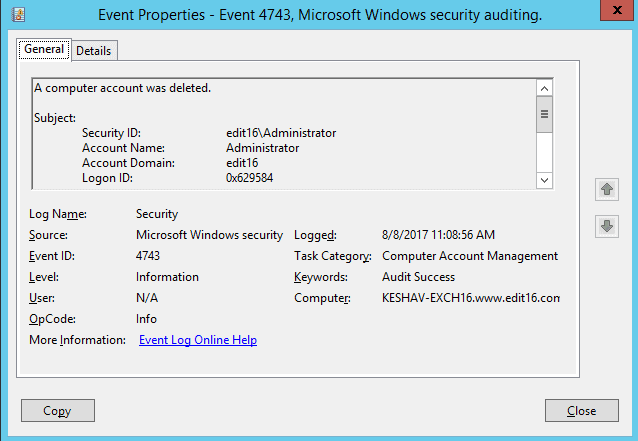
Figure 10: Event properties – Computer Account deletion You can scroll down to view the computer object that was deleted.
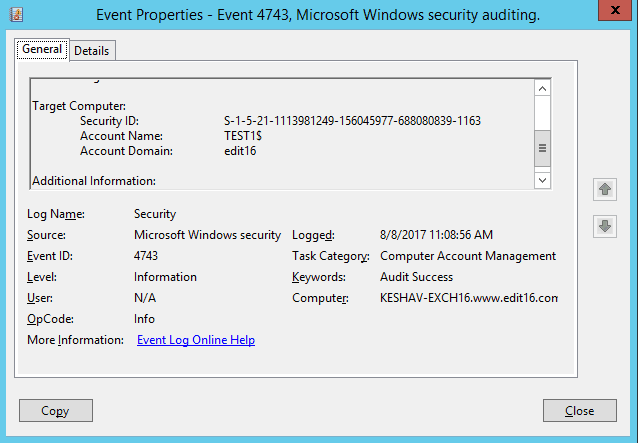
Figure 11: Displaying deleted computer account details
Track User and Computer Accounts Deletion with Lepide Active Directory Auditor
Lepide Active Directory auditing solution enables you to easily see all changes made in Active Directory Objects; including user and computer accounts. It can give you instant alerts whenever any modifications are made to objects, which enable you to act faster in mitigating the implications that could arise.
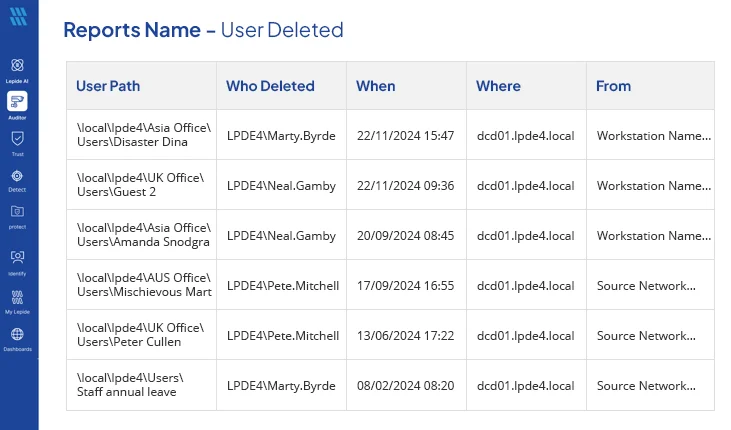
The following screenshot displays a “User Deleted” report. You can select an event to dig deeper into the who, what, when and where details of the change. In the left panel, you can see a list of all Active Directory audit reports that can help give you complete insight into the changes taking place in your AD:
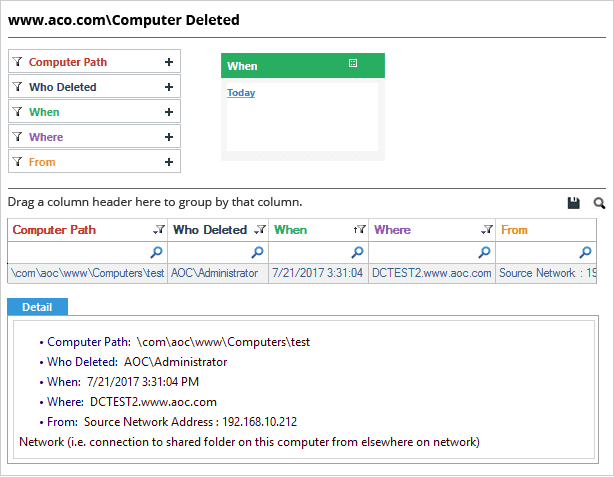
Similarly, the following screenshots show a “Computer Deleted” report:
Lepide Active Directory Auditor is more than just an auditing solution, it is all you will ever need in order to detect and reverse any unwanted or unauthorized changes in Active Directory. Lepide AD auditing solution helps you retrieve deleted objects and undo the changes made to modified objects. Our solution regularly captures backup snapshots of Active Directory at periodic intervals. You can restore deleted and modified objects, including User Accounts and Computer Accounts, from these snapshots, even when deleted objects aren’t in “tombstone” or “logically deleted” states.
Conclusion
I hope I’ve delivered what I promised at the beginning of this article. That being, showing you how to track deleted user and computer accounts in Active Directory (and hopefully demonstrating why Lepide Active Directory Auditor is the best way of doing this). Quite obviously, native auditing generates so many logs that it can be difficult for administrators to derive any meaning from them. Lepide’s Active Directory Auditor, on the other hand, is an automated solution that pro-actively audits, monitors and alerts on changes to Active Directory and Group Policy Objects. Sit back and let Lepide Active Directory Auditor do all the work!