Last Updated on December 23, 2024 by Ashok Kumar
Data Loss Prevention for businesses using Microsoft Office 365 provides a good structure to protect essential and valuable information. The DLP in Office 365 therefore goes beyond being just a compliance mechanism but comes with enhanced features for detecting, and tracking as well as preventing exposure of sensitive data in Office 365 within email communication, shared documents collaborations, etc.
This blog uncovers basic information about DLP in Office 365 outlining how it operates, what makes it distinct from other solutions, and how to align it effectively. Given the details of DLP policies and various recommendations regarding them, an organization can successfully address the delicate issue of data accessibility without compromising on security, or, in other words, help its employees remain efficient and retain control over the data that they work with.
What is Data Loss Prevention in Office 365?
Let’s imagine an employee has attached a file containing some top-secret information to the wrong email or a coworker has uploaded information to an open cloud storage. Such failures can result from negligence or mistake, which have severe consequences for data confidentiality. This is what Data Loss Prevention (DLP) seeks to curb.
Office 365 Data Loss Prevention is a blend of measures that can allow the organization to monitor and control data leaks within the organization and further prevent the data from being shared through email or other communicative means. DLP provides the possibility to automatically identify data that should not be disclosed without permission, for instance, credit card numbers, information on people’s health, and intellectual property.
Is DLP a Part of the Microsoft 365 Package?
Indeed, DLP is part of Microsoft 365. You can get it through the Microsoft Purview Compliance Portal, and it offers out-of-the-box policies based on industries and laws. Regardless of whether your organization is concerned with the transmission of financial data, healthcare information, or other forms of intellectual property, DLP includes these instruments to assist in compliance and the prevention of leakage.
How DLP in Microsoft Office 365 Works
In a nutshell, the primary work of Microsoft 365 DLP is that it sets certain norms and regulations that need to be followed when dealing with this information. These rules define which data needs to be safeguarded and how they should be controlled if an attempt from an unauthorized user is made to transfer the data. For instance:
- If a user attempts to transfer an email with some sensitive information to an outside party, then DLP can prevent the email and at the same time alert the user with a policy reminder on why it was done so.
- When there is sensitive data inside of SharePoint or OneDrive features, DLP policies can label it for review or even block it.
This intelligent system isn’t based on a specific set of rules that have to be followed strictly. It employs sophisticated classification schemes, grants recognition to patterns while evaluating context, as well as filters out non-threatening healthy traffic while flagging suspicious traffic.
Microsoft Office 365 DLP Policies
Microsoft Office 365 DLP policies are preconfigured rules that allow you to monitor user activities and take appropriate action depending on the rules and policies set by your organization. The goal of implementing these policies and applying protective actions is to prevent the inadvertent sharing of critical files and subsequent data loss. Office 365 provides a number of pre-populated DLP policy templates designed around different data categories and geographical regions. For example, there are templates for UK Financial Data, US Financial Data, UK Access to Medical Reports Act, US Health Insurance Act (HIPAA) Enhanced and so on.
Microsoft Office 365 DLP allows you to:
- Warn users when they try to share sensitive information inappropriately by displaying a pop-up policy tip
- Block users from sharing sensitive items, or alternatively, by customizing the options you can allow access by overriding permissions and record the justification
- Block the sharing of data which doesn’t include the ‘override permissions’ option
- Lock and move sensitive items (for data at rest) to a secure location
- Hide sensitive information
Microsoft 365 DLP policies allow you to identify, monitor and protect critical data across:
- Microsoft 365 services such as Teams, Exchange, SharePoint and OneDrive
- Office applications such as Microsoft Word, Excel and PowerPoint
- Windows 10 endpoints
- Non-Microsoft cloud apps
- On-premises file shares and on-premises SharePoint
How to Setup DLP in Office 365
The first thing you need to do when setting up DLP in Microsoft Office 365 is create a set of DLP policies in the Microsoft Purview compliance portal. You will need to specify how and where these policies should be applied. You can customize the rules which apply to your data, as you choose. For example, you can specify how many times a particular piece of information can be shared before an alert is triggered.
You can also customize the tips that are shown to users to help them understand what data they can share, how, and why. Once a policy has been created, it can be either disabled or enabled, so it can be active immediately.
The following steps explain how to set up DLP in Microsoft Office 365:
Step 1– Go to the Microsoft Purview Compliance Portal
Step 2– On the left, click Data loss prevention, and then choose Policies:
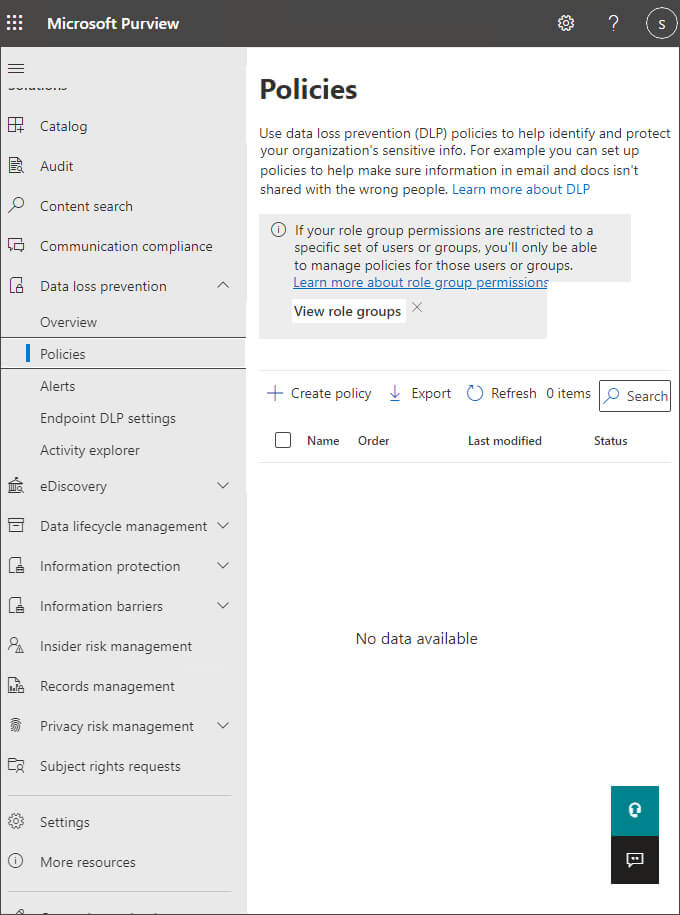
Step 3– From the main part of the screen, choose Create Policy
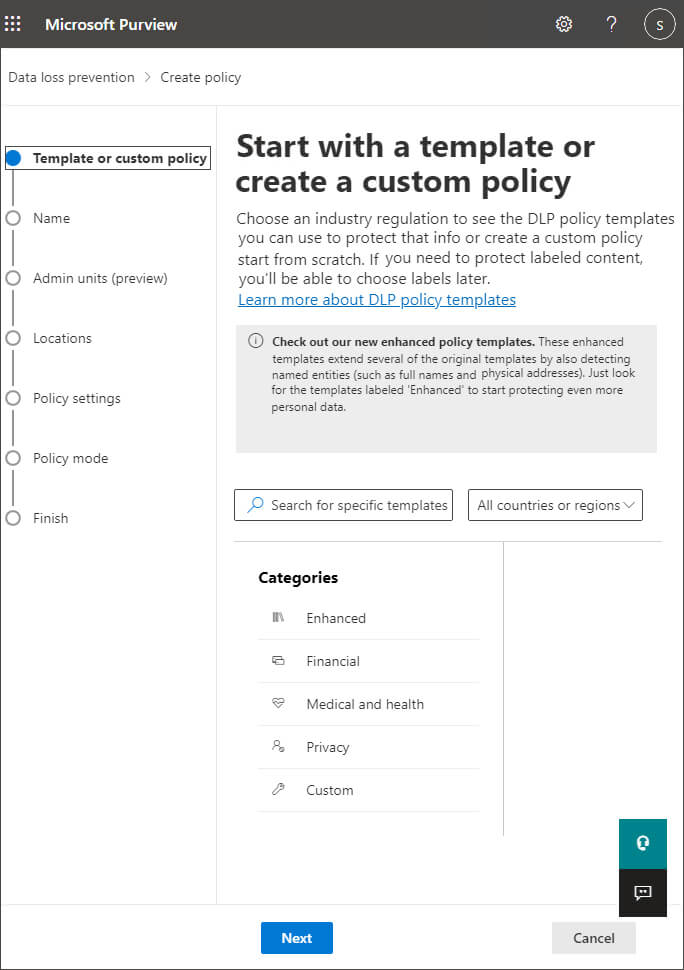
Office 365 provides a number of pre-populated DLP policy templates. For example, for UK organizations, there are templates for detecting the following:
- Data Subject to the PCI Data Security Standard (PCI DSS)
- Data subject to UK Access to Medical Reports Act
- Data subject to the UK Data Protection Act
- Data subject to the Gramm-Leach-Bliley Act (GLBA)
- Data subject to the Payment Card Industry Data Security Standard (PCI-DSS)
- United States personally identifiable information (U.S. PII)
- Data subject to the Health Insurance Portability and Accountability Act of 1996 (HIPAA)
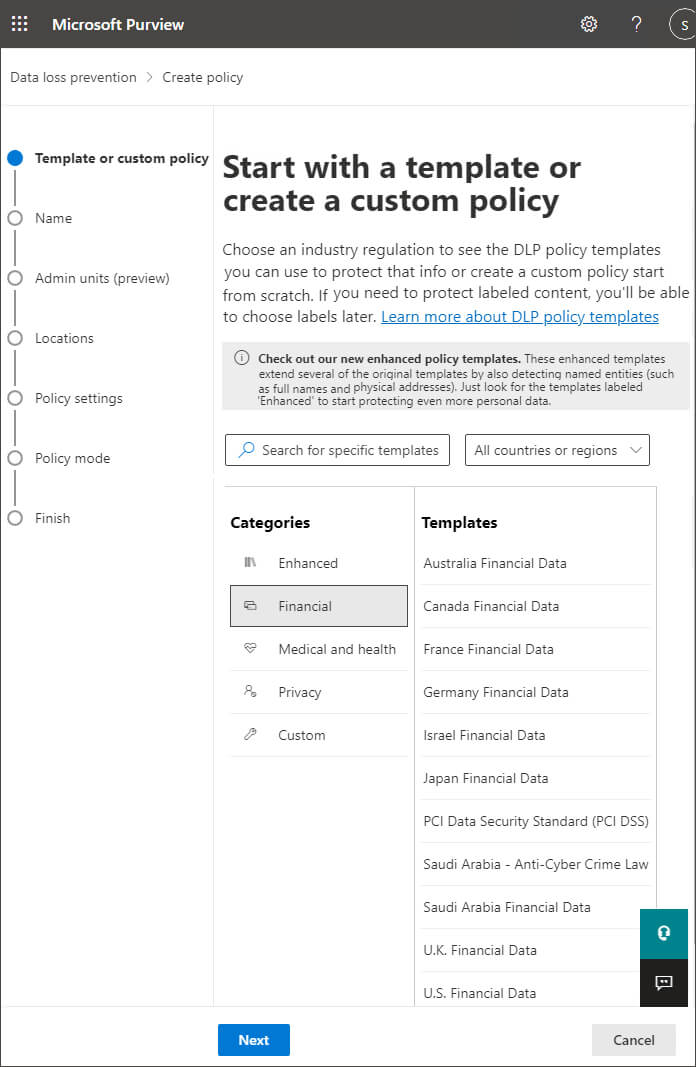
Step 4– For our example, click Financial and then Financial Data. Click Next
Step 5– Give the policy a Name and Description. Click Next
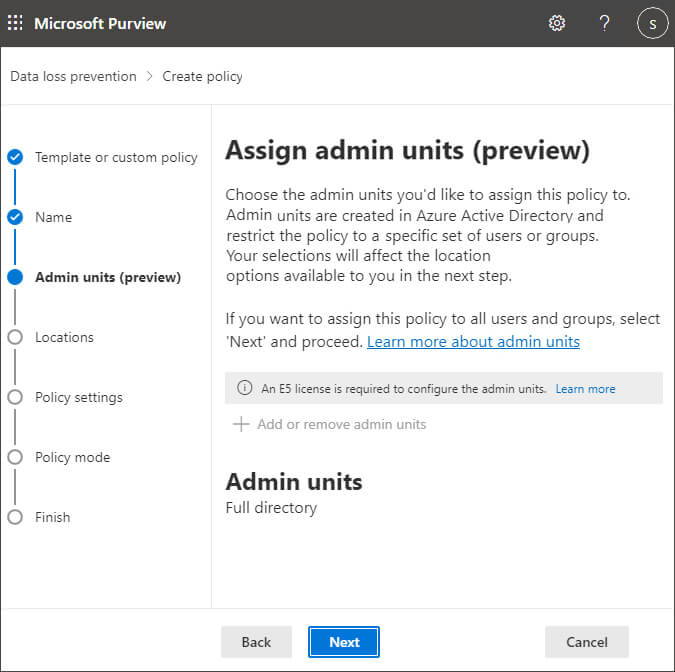
Step 6– The Assign admin units screen is displayed:
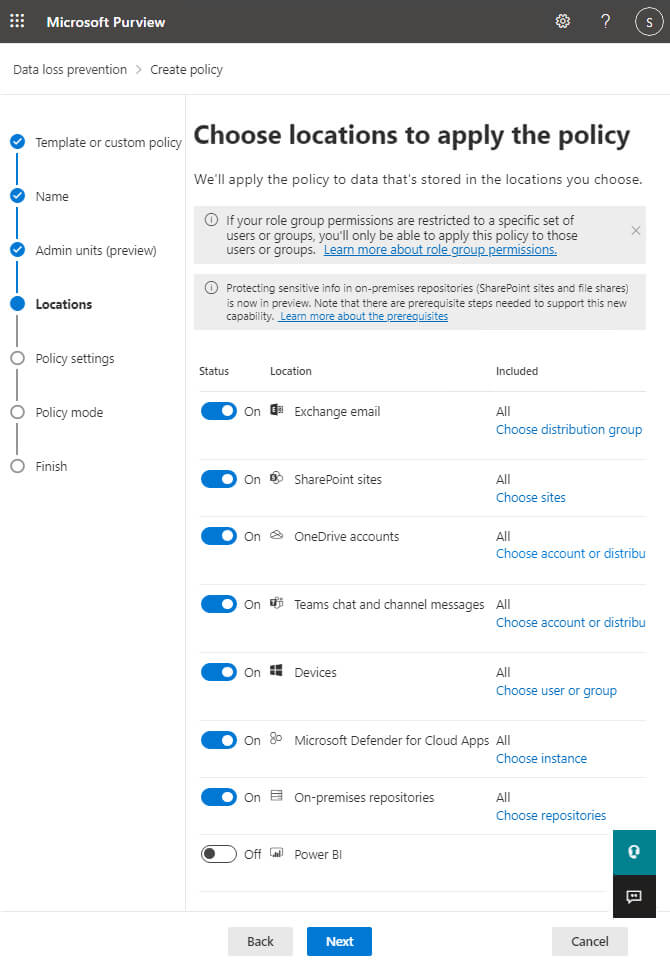
Step 7– From the Choose locations to apply the policy page, select which parts of the Office 365 service this data loss prevention policy will be enforced in. For this example, let’s choose All locations. Then click Next.
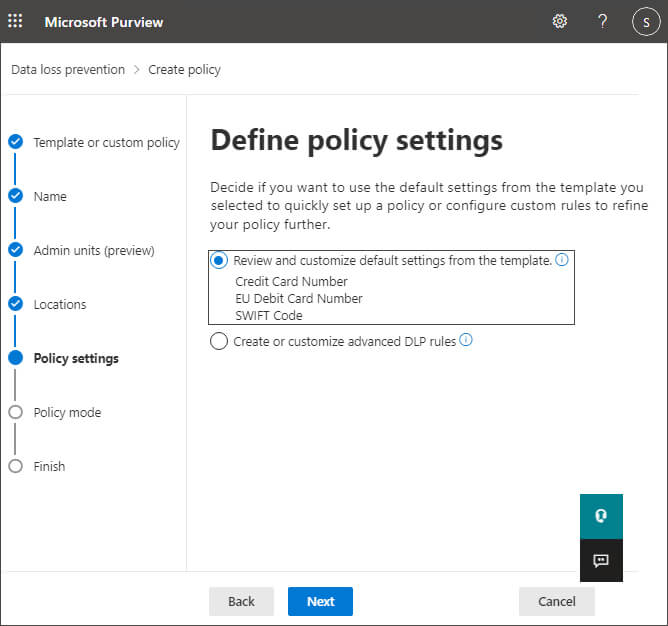
Step 8– On the next screen, you can customize the types of information this policy will apply to. In most cases, you will want to accept the defaults. In this example, we’re looking for financial information such as credit card numbers, EU Debit Card Numbers and SWIFT code. We want to know when anyone attempts to share this content with people outside our company. Click Next.
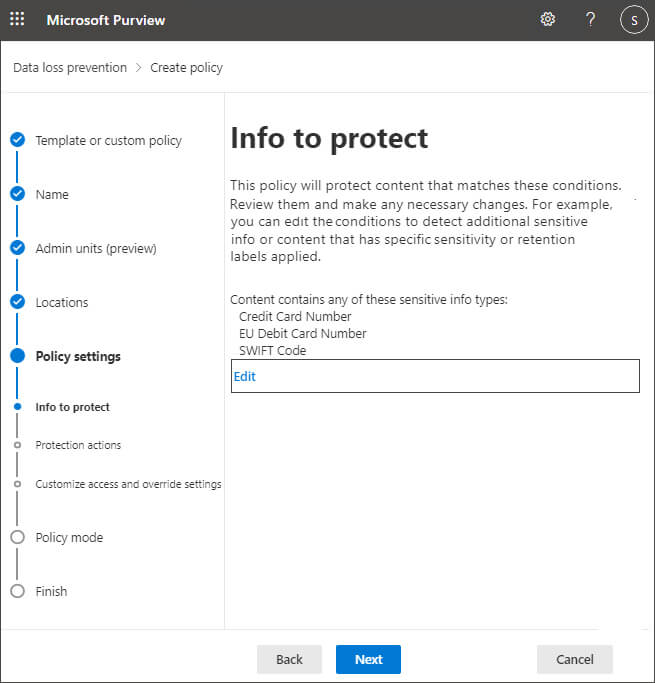
Step 9– Here you can choose which information to protect:
Step 10– Click Edit to change the options and the following screen is displayed:
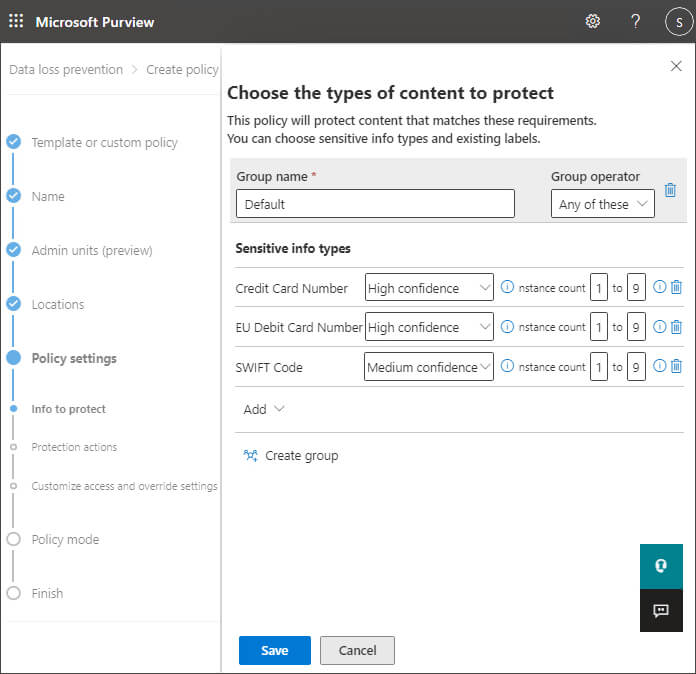
Step 11– Click Save to save any changes
Step 12– Click Next
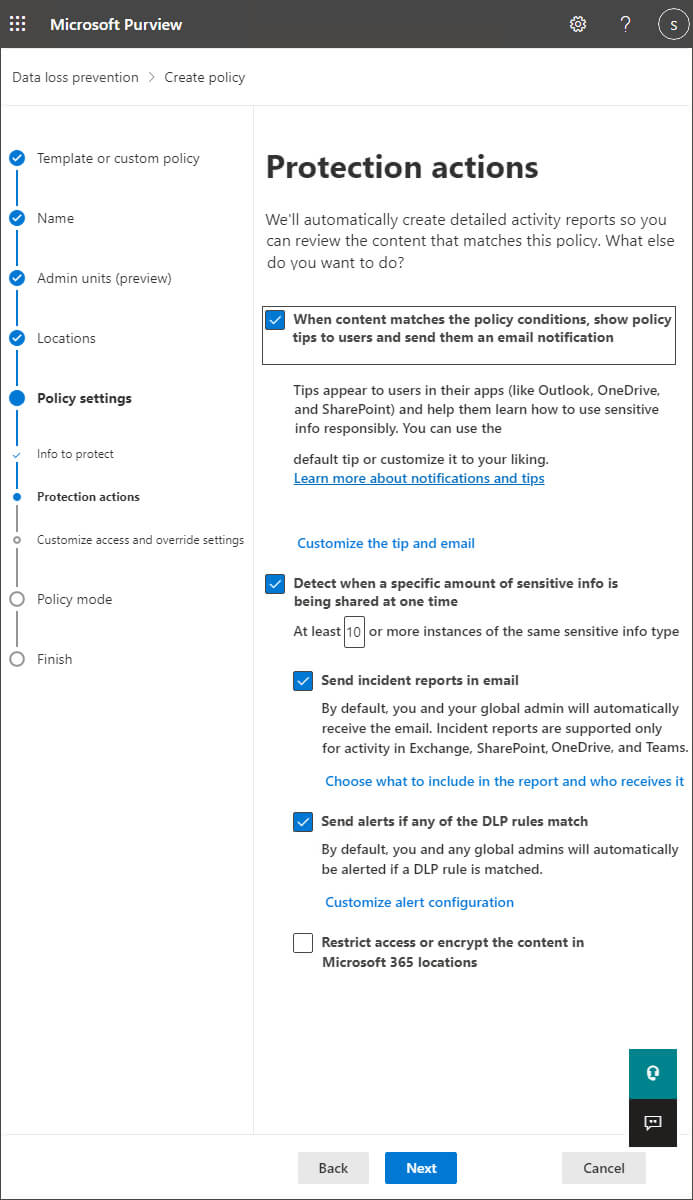
Step 13– Here, you’ll be asked what methods of enforcement you want to use.
You can choose to just show policy tips to the user, which will just inform the user that they’re working with sensitive information. Alternatively, you can select to notify certain people or block the actions. Click Next
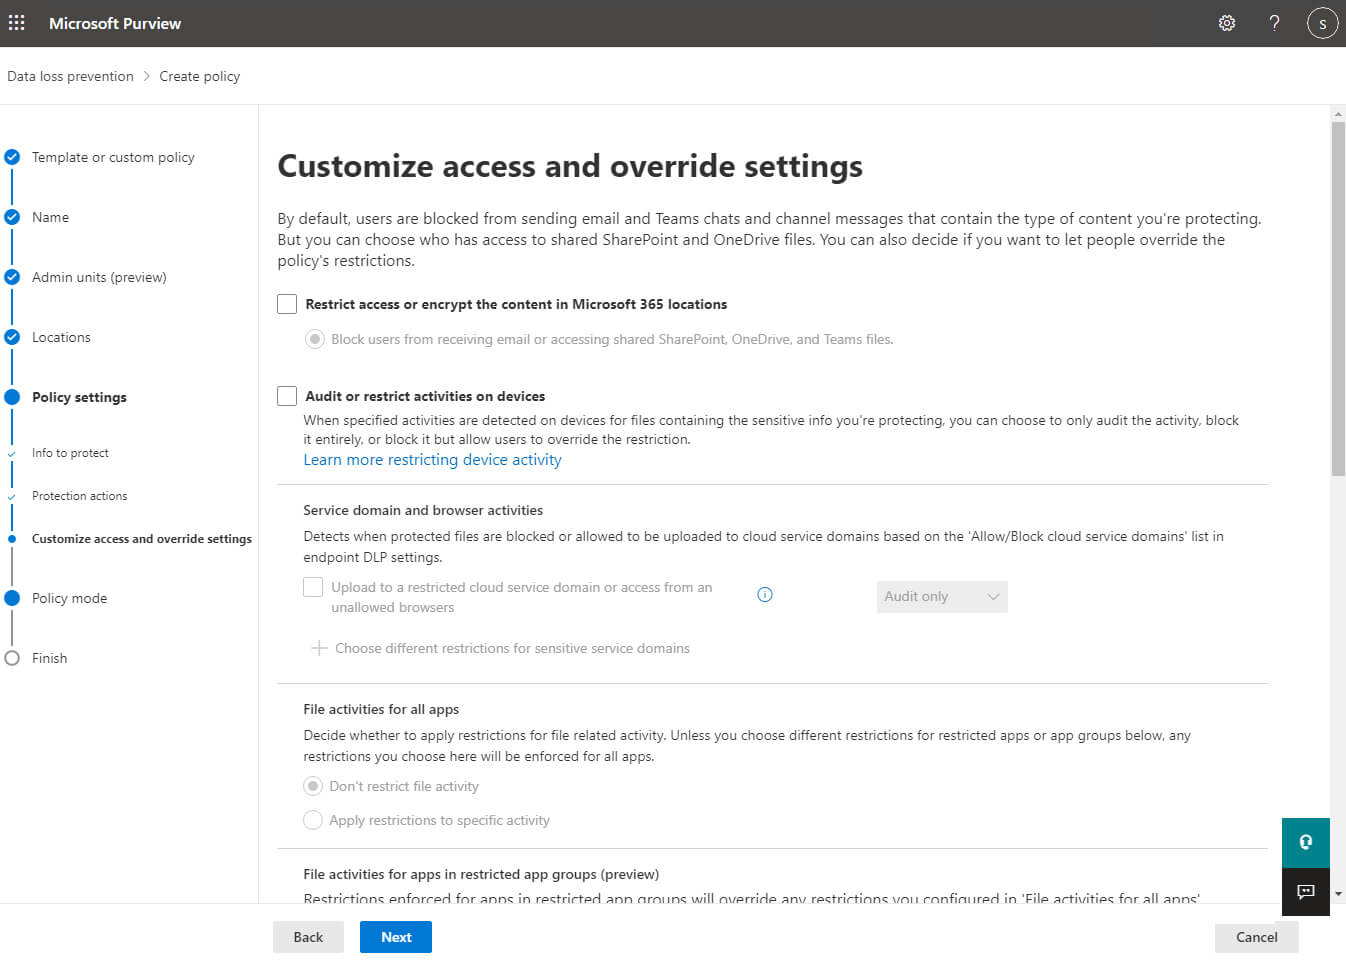
On the next page, you can choose to block certain people from accessing SharePoint and OneDrive and Teams files, and whether and how users can override the DLP policy. Click Next

Step 14– Finally, you can choose whether to run the policy in test mode or begin enforcement immediately. It is recommended that you use test mode for a while to make sure you won’t adversely affect user workflows.
Step 15– Test mode flags policy matches but doesn’t actually prevent any content from being sent. It is similar to a what-if mode to show you which content would trigger a policy. Click Next
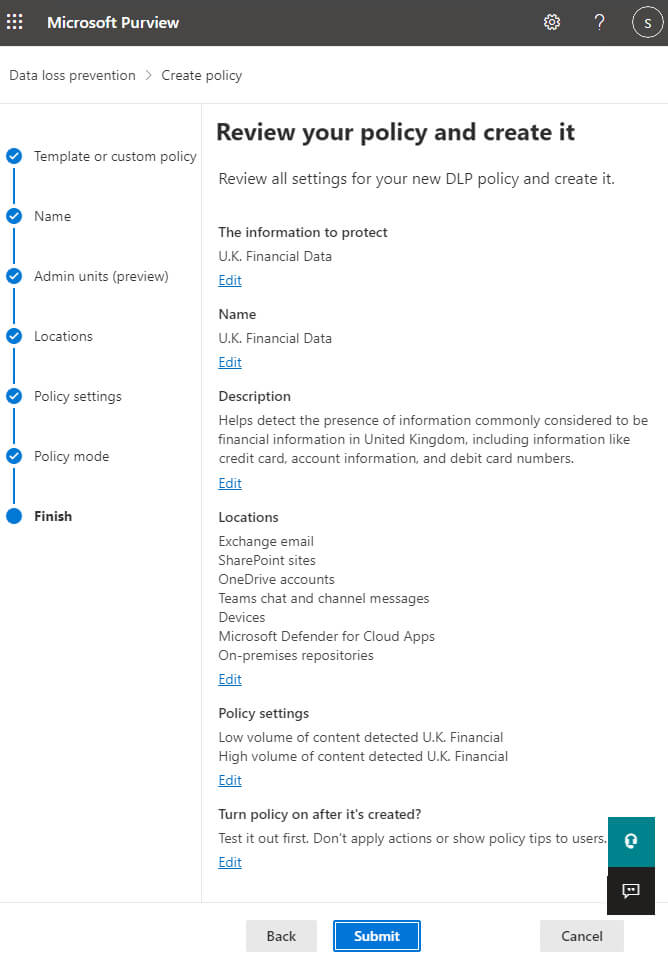
Step 16– Review your policy and then click Submit to create it.
Best Practices for DLP in Microsoft Office 365
Even though this article is centered around Office 365 data loss prevention, the tips below can be applied to any technologies you are using to store and process your sensitive data.
Data classification
As mentioned previously, Office 365 has features that can automatically identify and classify sensitive data. However, it’s worth noting that there are numerous third-party data classification tools available that may provide additional features.
Such tools are able to automatically scan your documents (and emails) for credit card numbers, Social Security numbers, passport numbers, protected health information, and more. In order to reduce the number of false positives, the O365 DLP tool uses a variety of methods to identify sensitive data. For example, to locate a credit card number, it will use regular expressions to find pattern matches, validate checksums, and examine other related content in an attempt to determine the context of the data.
Remove redundant data
Once you know what data you have, and where it is located, the next step is to remove any data that you don’t really need, as this will help to streamline your DLP strategy.
Restrict access to sensitive data
To ensure that your data loss prevention strategy is effective, it is imperative that you adhere to the Principle of Least Privilege (PoLP), which stipulates that employees must only be granted access to the data they really need to adequately carry out their role.
Monitor access to sensitive data
A crucial part of data loss prevention is the ability to determine who has access to what data and when. You can enable auditing in the Microsoft Purview compliance portal with your Microsoft 365 Admin account, which allows you to review a wide range of activities such as uploads to OneDrive or SharePoint Online or user password resets. You can also enable mailbox auditing.
Of course, there are dedicated third-party auditing solutions that will provide features that are not available with the native Microsoft 365 auditing tools. You may want to consider using a third-party solution if you are using multiple cloud platforms or a hybrid solution, which includes on-premise environments.
How Lepide Helps Audit Office 365 Changes to Prevent Data Loss
Unauthorized configuration changes can potentially prevent Office 365 users from performing business-critical tasks, such as using documents on SharePoint Online or sending emails through Exchange Online.
Disruptions like these can result in severe financial losses.
To help prevent this from happening, the Lepide Data Security Platform enables you to audit Office 365 changes to give you full visibility on changes taking place. Lepide is easy to use, scalable, and allows you to overcome all manner of security, operations, and compliance challenges – all from a single console.
To see exactly how Lepide helps you keep your data secure in Office 365, schedule a demo with one of our engineers today.