


PowerShell is still a valuable tool for Office 365 administrators. Even though cloud solutions imply simplicity and ease of use, which is not how Windows PowerShell is generally described, there are some useful Office 365 PowerShell cmdlets for system administrators. Also, instead of searching through the many options available in the Office 365 portal, administrators sometimes find it easier to type a few lines of code to get what they need. After looking at these commands, you’ll see that PowerShell, even if not straightforward to use, can be a valuable tool, even for cloud-based systems.
An alternative, more straightforward, solution to using PowerShell for Office 365 reporting is to use the Lepide Auditor for Office 365 which we will take a look into at the end of this article.
Top 10 Office 365 PowerShell Commands
Below is the list of ten most commonly used PowerShell cmdlets in Office 365.
1. Connecting to an Office 365 Instance with PowerShell
The first step is to install the Office 365 module for Windows PowerShell and connect to the Office 365 instance:
- Download and install the Microsoft Online Services Sign-in Assistant for IT Professionals RTW
- Import the Online Services PowerShell module for Microsoft Azure Active Directory and Office 365:
Install-Module -Name AzureAD Install-Module -Name MSOnline - Enter your Office 365 admin credentials:
$Cred = Get-Credential - Connect to all Office 365 services:
Connect-MsolService –Credential $O365
Once the modules for Windows PowerShell have been imported, we can manage our Office 365 instance.
2. Connecting to Exchange Online and SharePoint Online with PowerShell
We can also connect to Microsoft Exchange Online and Microsoft SharePoint Online separately. Connecting to Exchange Online with PowerShell is essentially the same as connecting to Office 365:
$Cred = Get-Credential
Connect-ExchangeOnline -Credential $Credential -ShowBanner:$False
Connecting to SharePoint Online is slightly different. To manage your SharePoint Online tenant, you first need to download and install the SharePoint Online Management Shell feature. Then run the following PowerShell script:
$admin="username@lepidesoftware.onmicrosoft.com"
$orgname="lepidesoftware"
$userCred = Get-Credential -UserName $admin -Message "Type the password."
Connect-SPOService -Url https://lepidesoftware-admin.sharepoint.com -Credential $userCred
3. Get a list of Available Office 365 PowerShell cmdlets
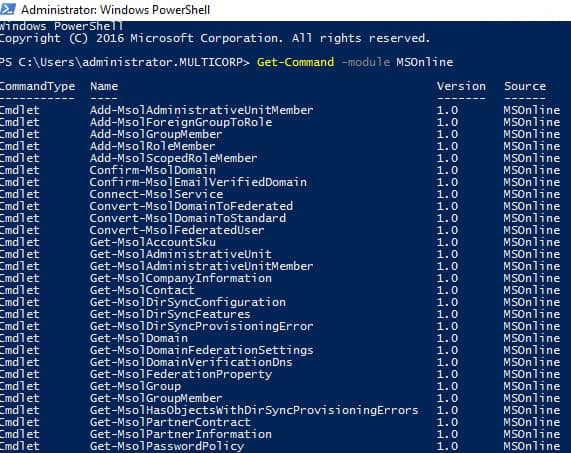
Run the Get-Command cmdlet to get a list of all available Office 365 PowerShell commands:
Get-Command -module MSOnline
We can also get the list of cmdlets for Azure Active Directory:
Get-Command -module AzureAD
4. Get a list of all Office 365 Users with PowerShell
If you need to generate a list of Office 365 users and licenses, use the Get-MsolUser cmdlet. This will retrieve all users with a valid license in the Office 365 tenant, along with the DisplayName, City, Department and ObjectID parameters.
Get-MsolUser -maxresults 100 | Select DisplayName, Department, ObjectID
Get-MsolUser -EnabledFilter EnabledOnly -MaxResults 100
To see the number of account licenses, you need to run the following cmdlet:
Get-MsolAccountSku
To list the available services, run the following script:
Get-MsolAccountSku | select -ExpandProperty ServiceStatus
5. Creating a New User in Office 365 with PowerShell
To create a new user, we use the New-MsolUser command:
New-MsolUser -UserPrincipalName JSmith@lepidesoftware.onmicrosoft.com -DisplayName "John Smith" -FirstName “John” -LastName “Smith”
The system will output the user’s password and license status data.
6. Removing a user from all sites with PowerShell
To remove a user from all sites at once, we can use the following command:
$AdminSiteURL="https://lepidesoftware-admin.sharepoint.com"
$UserAccount = "username@lepidesoftware.onmicrosoft.com"
Connect-SPOService -URL $AdminSiteURL -Credential (Get-Credential)
$SitesCollections = Get-SPOSite -Limit ALL
ForEach($Site in $SitesCollections)
{
    Write-host -f Yellow "Checking Site Collection:"$Site.URL
    $User = Get-SPOUser -Limit All -Site $Site.URL | Where {$_.LoginName -eq $UserAccount}
    If($User)
    {
        Remove-SPOUser -Site $Site.URL -LoginName $UserAccount
        Write-host -f Green "`tUser $($UserAccount) has been removed from Site collection!"
    }
}
7. Changing a Password in Office 365 with PowerShell
If you need to change the password for an account, use the Set-MsolUserPassword cmdlet.
You can either specify a new password as in the example below or omit the -NewPassword parameter to have the system automatically generate a random password.
Set-MsolUserPassword -UserPrincipalName JSmith@lepidesoftware.onmicrosoft.com -NewPassword 2wsx@WSX@128. Managing Group Membership in Office 365 with PowerShell
Office 365 groups can be managed using PowerShell cmdlets. To retrieve a list of all groups in Office 365, simply use the command Get-MsolGroup. To add users to a group, use the Add-MsolGroupMember command:
This command gives all User groups in Tenant:
Connect-MsolService

Get-MsolGroup
To add members to Office 365 groups:
$Credential = Get-Credential
Connect-ExchangeOnline -Credential $Credential -ShowBanner:$False
Add-UnifiedGroupLinks -Identity "Groupemail@lepidesoftware.onmicrosoft.com" -LinkType "Members" -Links "membername@lepidesoftware.onmicrosoft.com"
GroupObjectId is the hexadecimal ID of the group, which you can get from the Get-MsolGroup command. GroupMemberObejctId is the user object ID, which you can find by running this command:
Get-MsolUser | Select ObjectID.
To remove a user from a group, use the Remove-MsoGroupMember cmdlet.
9. Creating a SharePoint site collection with PowerShell
We can also create a SharePoint site collection using PowerShell:
Connect-SPOService  -url https://lepidesoftware-admin.sharepoint.com
New-SPOSite -Url "https://lepidesoftware.sharepoint.com/sites/PowershellSite1" -Owner "ownername@lepidesoftware.onmicrosoft.com" -StorageQuota "100" -Title "Powershell Site1"
10. Creating Reports in Office 365 with PowerShell
PowerShell can be used for creating different reports. Here are some useful Office 365 reports done via PowerShell:
Details about all mailboxes:
Get-mailbox | get-MailboxStatistics
A list of all mailboxes that haven’t been logged into during the last 30 days:
get-mailbox -resultsize unlimited |Get-MailboxStatistics | where {$_.LastLogonTime -lt (get-date).AddDays(-7)} | ft displayName,lastlogontime,lastloggedonuseraccount,servernameA report on the highest volume senders and recipients:
Get-MailTrafficSummaryReport -Category TopSpamRecipient
Please note that most of the reporting cmdlets were deprecated in January 2018 and replaced by the new MS Graph Reporting API. Therefore, some reports are now available only in the Office 365 Security & Compliance Center.
How Lepide Helps in Office 365 Reporting
This native method of running Office 365 reports can be both time consuming and complex. An alternative, more straightforward, approach to PowerShell commands is to use Lepide Auditor for Office 365. With the Lepide Auditor, you can easily run Office 365 reports without needing any knowledge of PowerShell.
The report below is Mailbox Accessed by Owners:
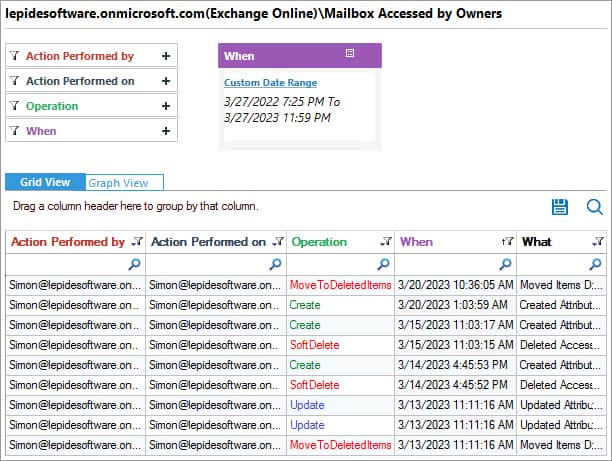
This shows Who has logged on, the Operation, When it was done and What action was carried out.
- To run the report, click the User Entity & Analytics icon
- From Exchange Online, select the Mailbox Accessed by Owners Report
- Choose a time period and click Generate Report
- The report can be filtered, sorted, saved and exported.
You can generate many other useful Office 365 reports with the help of our solution.